Ask any of my friends and they’ll tell you I love gadgets and technology. I definitely have techno joy. Here are a few of the apps that I use on a daily basis.
Ask any of my friends and they’ll tell you I love gadgets and technology. I definitely have techno joy. Here are a few of the apps that I use on a daily basis.
Recently I made a video about determining rates for clients. The “How Much Should I Charge” video has spawned a few questions from viewers. So to clear up some confusion I’m posting this response. Specifically I’m referring to a conversation I had on twitter with @noahkrueger, @SmudgedPhoto, and @PicSeshu. Let’s dive in to the questions:
@SmudgedPhoto:
Why should your personal bills affect what a client pays? A large morgage doesn’t justify large fees?@noahkrueger:
I find it hard to believe anyone would pay more for a photographer simply because s/he has a family.
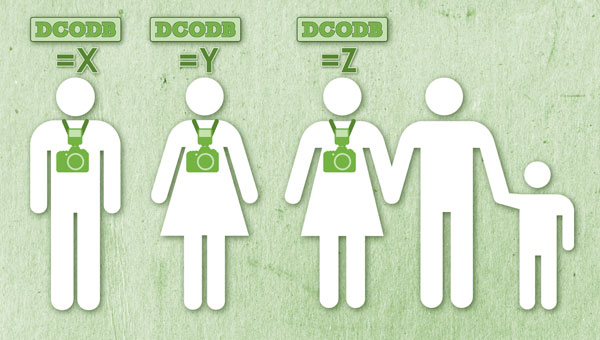
These question stem directly from the discussion of determining your DCODB (Daily Cost Of Doing Business). In that portion of the video I was specifically talking about how much it costs a photographer to be in business. Part of the process is to add up all of your costs; insurance, mortgage, travel, photo gear, etc. I made the point of saying that the DCODB is not the same for every photographer. I think that’s where the confusion began.
If you are a single person who has to pay for your health insurance, dental insurance and other costs than you have to earn more than a person who has those costs paid for by a spouse. Therefore your DCODB is different and you’ll need to earn more (or less) money to earn a profit. These are strictly costs. Rates are a different beast.
Rates are determined with this simple formula: DCODB + shoot costs + markup = rate.
If a person has a high DCODB and this causes their rate to be sky high, and is therefore not competitive, that doesn’t mean they will be able to charge that rate successfully. It means that their costs are too high and they need to work on ways of lowering their DCODB.
Let’s say a highly successful Wall Street trader who enjoys an annual salary of $2,000,000 decides she wants to give up the rat race and become a wedding photographer. Let’s also pretend that this Wall Street guru has a monthly mortgage of $30,000 and a car payment of $800, etc. Unless that person makes some drastic lifestyle changes her DCODB is going to be incredibly high due to her salary requirements. It also means that the rate she’d have to charge to meet that requirement will be overpriced for the market. She won’t get any jobs and her business will fail.
Let’s try a different scenario. Perhaps there is a local photographer who is a recent college graduate. This guy is very talented, has no car payment, a low rent and his insurance bills are tiny. His DCODB is very low and he’ll be able to charge rates that are lower than his competitors because his salary requirement is much lower.
Why do bills affect what a client pays? Because your bills determine your salary requirement. They are connected. The moral of the story; stay out of debt, live within your means, save your pennies.
Will someone pay more for a person who has a family? No, the client doesn’t usually care. But being part of a family can increase what you need to earn or save you some money depending on specific scenarios. If your spouse is covering your health insurance and retirement needs then your DCODB is less. If you are the sole bread winner in your family you’re DCODB is probably higher.
Your financial lifestyle does effect your rates, for better or worse.
Follow me on twitter: @jmarkwallace
liveBooks has announced a terrific feature that I’ve been testing for the past month; it’s the integration of Vimeo and liveBooks. This means that you can have all of the ease of use of liveBooks for showing video on your liveBooks site. Once your site is Vimeo enabled it’s a breeze to add videos, change their display order and styling. And the nice part – everything plays right on the same page. No new pages appear to play the videos.
This is a terrific feature for someone like me. I create between 5 and 10 videos every single week. I’m very excited about the ability to show the “best of” videos as liveBooks portfolios. Finally I have one site to host all of my content.
To see the integration in action check out my liveBooks site.
Some photographers get it. They know that what’s in their head is much more important than what’s in their hand. I’m impressed with photographers like Andre of Striped Shirt or Michael Seneschal who take iPhone photos two an entirely new level.
These guys, and many like them, are a constant source of inspiration to me. Unfortunately you may have never seen their work before. Well, Adorama is trying to change that by giving everyone a place to post their best iPhone shots. For the next two weeks you can post your best work on their iPhone Photo Contest site. They have a panel of judges ready to look at your work and then hand out some very groovy prizes.

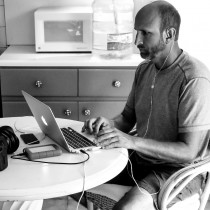
The thing I love about iPhone photography is that it lets you concentrate on the story that you’re telling without worrying about the technical aspects of the shot. It also allows you to build your skills at making images instead of simply taking images. If you’ve been a reader of our blog for a while you know that I’m a big fan of the iPhone and it’s abilities. Here are a few of my favorite iPhone lessons:
Inspiration in the Rocks

A couple of years ago I challenged a friend of mine to a photo duel. He was having a tough time finding things to shoot with his new super fancy camera. So we took his camera and my iPhone out to a pile of rocks (literally) and started shooting. Before long he was able to forget about all the technical barriers and free his mind to simply shoot. You can read all about it by clicking here.
Capturing the Moment

My trusty iPhone was also the camera I used to capture some of the images that are most memorable to me. I recently had the privilege of meeting James Nachtwey. His work has had a huge impact on my photography and how I approach life. Without my iPhone I would have no documentation of our meeting. Read more about my experience of creating a “disgusting” photo.
Getting Closer
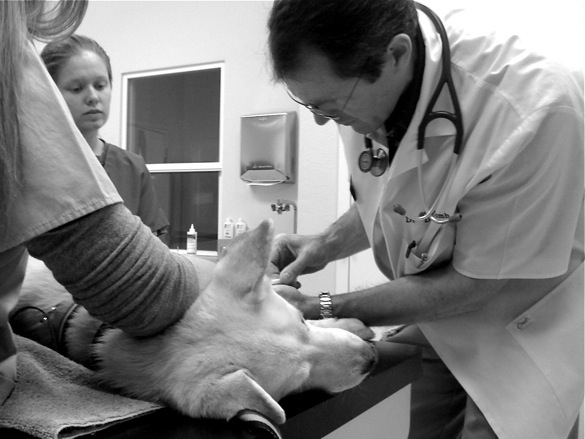
Last year I took a very close look at what photography meant to me on a personal level. I discovered that my iPhone helped me document and process events that were very close to my heart, like my dog Luka undergoing treatment for an unknown illness. Later we discovered he had Cancer. The thousands of iPhone photos we took during his lifetime helped us remember him after his death.
“Photography is an extension of who I am. Photography is a way for me to document, remember, share, and quantify my experiences. It’s the way I tell my version of the story.” – Mark Wallace
With my iPhone I am able to get closer, physically as well as emotionally, to my subjects. Read more about getting closer and how it may impact the way you see life.
What about you?
So what about your iPhone shots? Do you have a story to tell? Are you looking for inspiration? If you do then visit the Adorama iPhone Contest site and get involved. Sure you can win a bunch of great prizes, but more importantly you can inspire someone to try something new.
What are you waiting for?
 Monday PocketWizard will announce that the new AC5 RF Soft Shield will be given to all FlexTT5 owners free of charge.
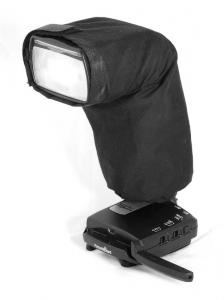
A couple of weeks ago I posted an iPhone update on YouTube about the new RF Soft Shield for the PocketWizard Mini and Flex. The big question was simple, “How much is this going to cost?” The answer: nothing. That’s right, everyone who owns a FlexTT5 can get a free AC5 RF Soft Shield from PocketWizard until January 31, 2010. Units sold in the future will have the RF Shield included in the box.
Getting a free RF Soft Shield is as simple as visiting this page: http://www.pocketwizard.com/news_events/promotions/ac5
I’ve been playing with the RF Shield, some call it “the sock”, for a few weeks now and the results are simply amazing. I’m getting ranges of several hundred yards. I’ve put the flash behind electrical units, football fields away, and had no failures. The truth is that I’ve been able to control my flash at such great distances that it’s not even practical. I’m not sure when I’d ever need to shoot with my flash 200 yards away, but I could.
The true benefit isn’t the extreme range but the reliable reception. 580 EX II owners can place their flashes anywhere they want with the confidence that the flash will fire and the exposure will be correct. But don’t take my word for it, check out this video and see for yourself.
![]()
I’m going to be in San Francisco and New York in the next few weeks and I’d love to hang out with you. I’m hosting a walkabout in each city. What the heck is a walkabout? Well, simply put, it’s when a bunch of photographers get together, walk around and take pictures. Scott Kelby calls them photo walks.
San Francisco: Sep 27, 2009. 10:30am
We’ll be meeting at Union Square Park. I’ll be bringing along my nifty ColorChecker Passport for anyone who wants to take a look at it. I’ll also try to bring a few more toys for people to look at and play with. It all depends on how much I can put in my baggage for the flight over. I’m thinking something small and portable may be cool. There are a few other surprises I’m working on, but I can’t spill the beans just yet.
New York City: Oct 24, 2009.
I’m working out the time and location for New York. It will definitely be in Manhattan. I’ll have a bit more time in New York and I’m working on having more toys for people to look at and play with. I’m working on having a few PocketWizards around, some Profoto gear, and of course the new ColorChecker Passport. Other surprises need to be confirmed.
Stay tuned to the blog for updates on these events. The admission is free and everyone is welcome to join us! If you think you may make it please leave a comment so I know what to plan on.
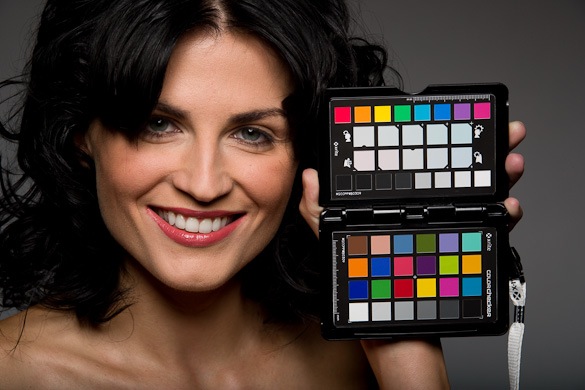
Image copyright 2009 Mark Wallace/snapfactory
A few months ago X-rite asked me if I was interested in testing out a new color checking device called the ColorChecker Passport. They gave me a brief overview of how it worked and I was sold. The Passport is a system for maintaining accurate color during capture and post production, specifically when using Adobe Lightroom.
The process is very simple. You place the Passport in the shot, take a photo, and then use that photo during post production to create a color profile for your photo sessions. This guarantees you have accurate color from the beginning. Once you get to your computer you use a simple Lightroom Plug-in to evaluate the shot and create the profile. It takes about a minute to do this.
This target allows you to adjust your white balance using the White Balance Selector in Lightroom. Just use one of the patches in the two center rows to warm up or cool down your photo. You can also check and evaluate shadow details or highlight clipping and check and control color shifting. This target makes the Develop module come to life.
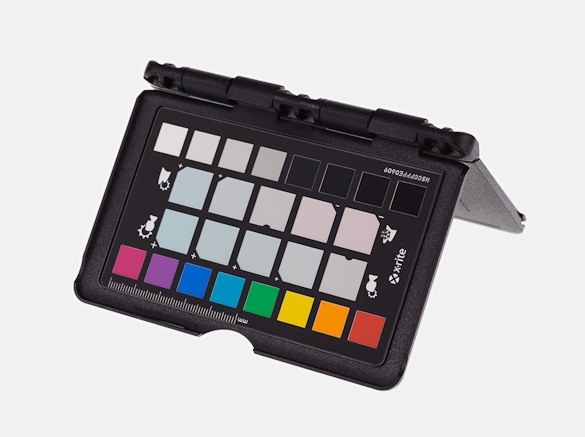
The passport includes two other targets as well:
A Classic target that’s used as an industry standard color reference. This is also what’s used to create the custom color profiles.

A White Balance target used to set your custom white balance in the camera during shooting.
For all of this to work you really need to complete the color management cycle and calibrate your monitor and printer. I use the Color Munki because it’s affordable, easy to use, and it works great. Click here for more info on the Color Munki.
Seth Resnick made a terrific video that shows the passport in action.
For more information visit the Passport page at X-Rite.
In May and June of this year I spent a lot of time working with PocketWizard on a few videos and some instructional content for their website. All of the new step-by-step instructional info is just about to go live on PocketWizard.com (it’s going to rock) and I wanted to give you a sneak peek at a couple of other videos that will hit their site soon.
The first video is just an overview of the PocketWizard MiniTT1 and FlexTT5. There are a few sample pictures and some behind the scenes video of me shooting in New York.
The second video explains hi speed sync and shows you how you can extend this functionality using the Mini and Flex.
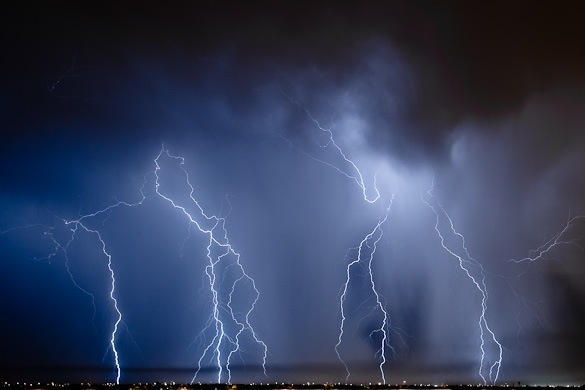
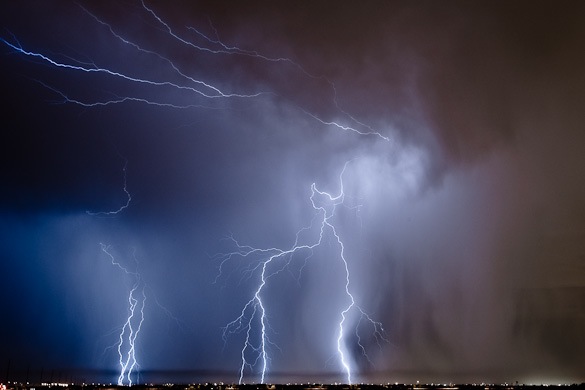
Last night we had our first big monsoon storm here in the desert. We had a ton of rain, wind, and lightning. I always love these big storms because it means I have another chance to capture some lightning shots.
There are many great ways to capture lightning and most involve some type of trigger that tells your camera when to open the shutter. I’d love to have some of that equipment but since I don’t I use a different method. It’s very simple and almost anyone can do it, but be warned, this method only works at night. Here’s how you do it.
Once you have all that set up you can “fish” for lightning. Click the shutter and wait 30 seconds. Any lightning that strikes during that time will be captured in your shot. Just keep clicking your shutter over and over and you’re bound to capture some great lightning. It’s not the best way to do it, but it is easy and it works. I captured both of these images using this method.
Once you get back from shooting your big storm you’ll need to do some post production. Your color temperatures (white balance) will need to be adjusted and you’ll probably need to do a bit of adjustments to the curves. You should be able to do all of that in Aperture or Lightroom.
When you’re shooting make sure you don’t do anything stupid, like getting too close to the storm or putting your camera in the rain. In Arizona it’s easy to shoot lighting from miles away. If this isn’t the case where you live than you may want to take pictures of something else. Be safe and have fun shooting.
Two weeks ago Diane and I were given a tour of the print shop at AdoramaPix in New York City. We met Ingrid a few weeks ago on twitter (@AdoramaPix) and she invited us to stop by when we were in town.
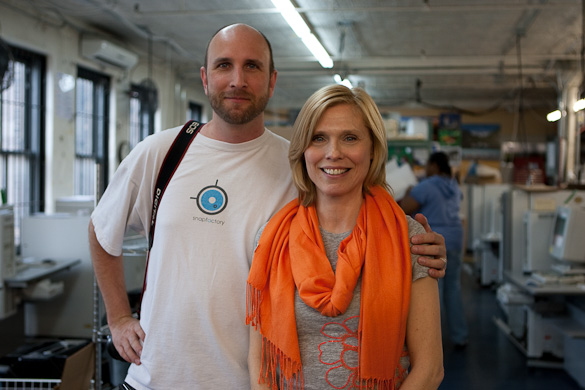
Mark and Ingrid in the print shop at AdoramaPix.
We were very impressed by the quality of the prints, but two things really stood out to us. The first – everything is hand made. Every print is individually inspected, color corrected, and handled by a human. Every single one. It’s amazing the detail these guys give to quality control.
Diane was blown away by the photo books. These books have a binding that allows every page to lie absolutely flat. There is no gutter – none at all. You can put a bride and groom smack in the middle of a two page spread with no worries.
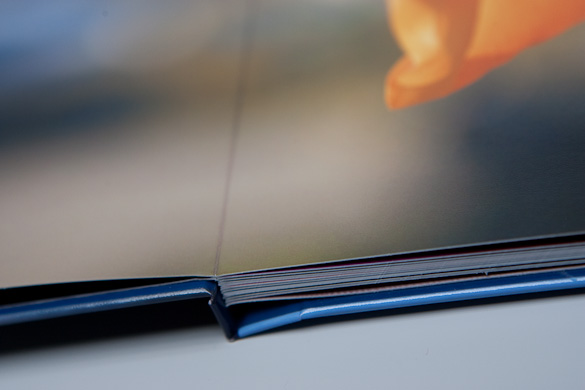
A close up view of the photo book binding.
If you’re looking for a great place to print books, posters, and more the I highly suggest you check out AdoramaPix! Also make sure you follow @AdoramaPix on Twitter for special offers and tips.