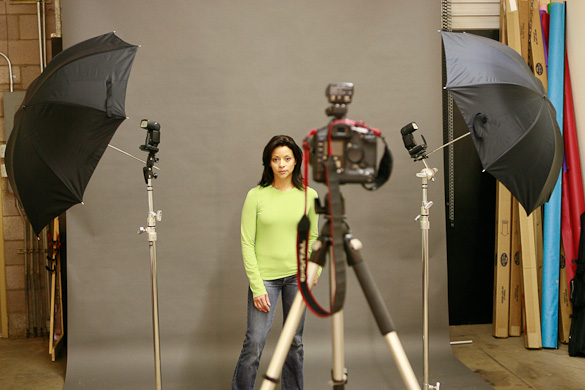
This is the first in a series of videos about our Interactive shoot. In this video we show you how we set up the lights, how we built the set, and some thoughts on the new Profoto Air Remote.
Category Archives: Behind The Scenes
PocketWizard MiniTT1 & FlexTT5: My Experience
Late last year I got an e-mail asking if I wanted to play with a super secret PocketWizard toy. I’m a huge PocketWizard fan and so of course I said, “bring it on!” In January I was given a couple of MiniTT1 and FlexTT5’s to play with.
I’m an avid PocketWizard user, I’ve even created videos about them. I’m also a long time Canon shooter. So when the new toys arrived it was almost as good as Christmas. I hired a model for a day and hit the street.
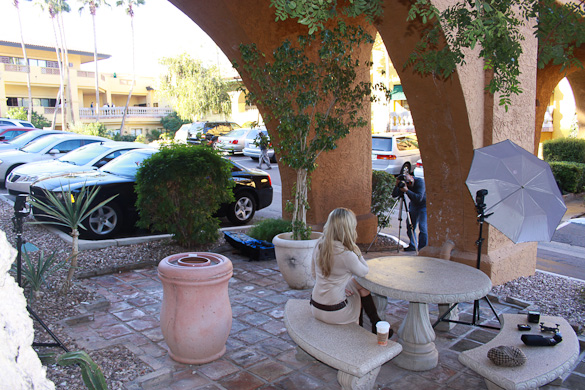
The first thing I tried was shooting with my flash “hidden” from my camera. In the first setup there was an umbrella and a column between the flash and camera. I had a MiniTT1 on the camera and a FlexTT5 on the flash. This challenge was so simple that I think the PocketWizards actually laughed at me. “Is that all ya got??” The system executed flawlessly.
My next test was to try adjust the flash exposure compensation from the camera. The new PocketWizards make the camera think the flash is actually sitting on top of the camera itself. So I ran the flash through a series of tests playing with my under and over exposure compensation settings. The PW shrugged this challenge off too. It worked perfectly.
Left: proper exposure. Right: Flash set to +1 exposure compensation.
To really try some groovy tests I slid a Canon ST-E2 on top of the MiniTT1. I added another flash to the mix and was very happy to see that I could adjust the lighting ratios with the ST-E2 just like it was operating normally. The PocketWizards are essentially invisible to the system. Spectacular! It’s the best of both worlds. The ease of use of the Canon system we all know and love and the security of a radio trigger from the best in the business.
Ok, so now I knew the system could see through walls, worked flawlessly with the Canon gear I already owned, and was smaller than the other PocketWizards I had in my bag. Now it was time for some more difficult tests.
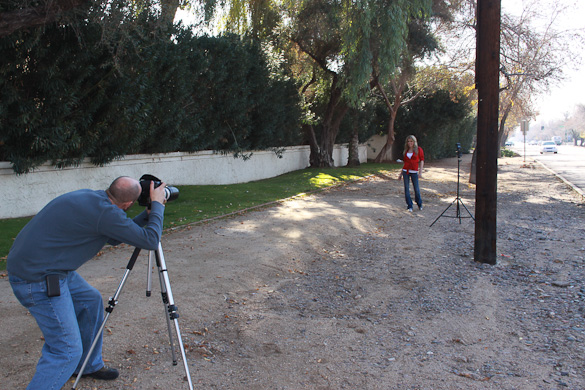
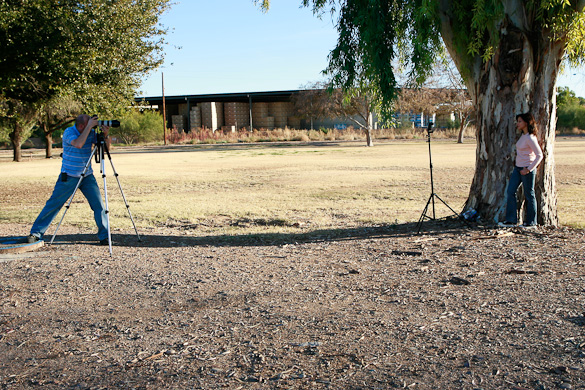
The next tests were designed to see if I could shoot at a distance and in bright sunlight. Here in Phoenix the sun can be a major challenge. We rarely see clouds in the sky. This bright sunlight can really destroy a line-of-sight system. The sun just washes out the signals from the transmitter. The first test was moderately easy. I shot in the shade at a distance of about 20 feet from the flash. Not a problem at all.
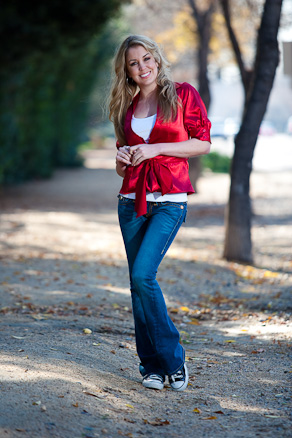
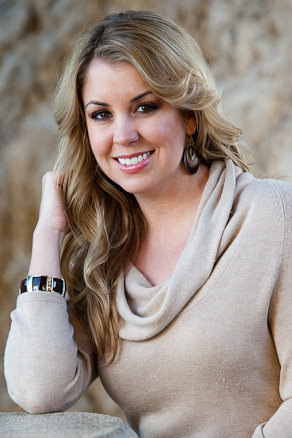
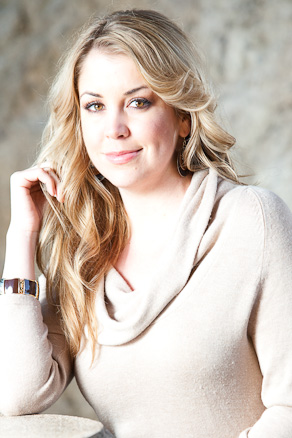
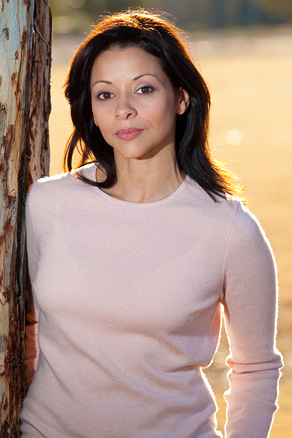
My model, Sarah Coggin, smiles as I shoot away.
The moderate light and distance test was easy for the PW system. We decided to put the system to the ultimate test – direct Phoenix sunlight. We headed to Papago Park and shot in nasty 2:00 direct sunlight. This light was brutal; a true line-of-sight killer.
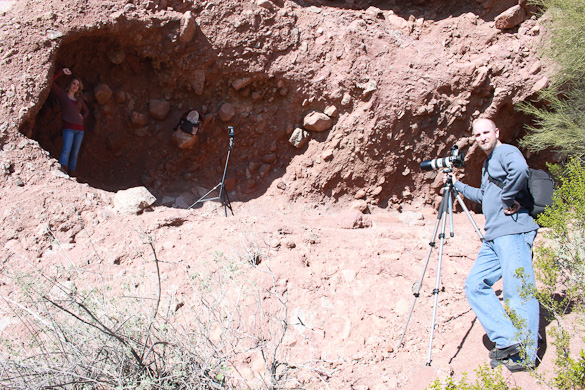
Yeah, we were melting.
We shot a few tests in this location. I really wanted to see how the system would hold up shooting in a rugged area. Again, I had no issues. The flash behaved just as if it were sitting on top of my camera. I could adjust flash exposure compensation, turn the flash on and off, and do anything I wanted all from a distance from the flash.
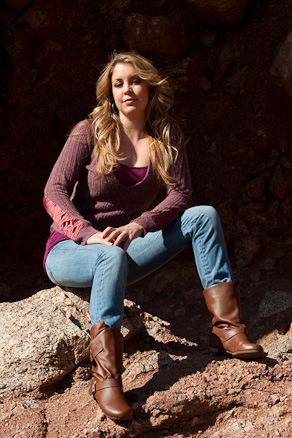

Left: flash turned off. Right: fill flash added.
The new PocketWizards had passed the field tests with flying colors. The following day I did a few tests in the studio just to see if they would feel at home.
Canon 430 EXII mounted to a PocketWizard FlexTT5.
A couple of Canon 430’s with FlexTT5 units. On Camera: MiniTT1 and Canon ST-E2
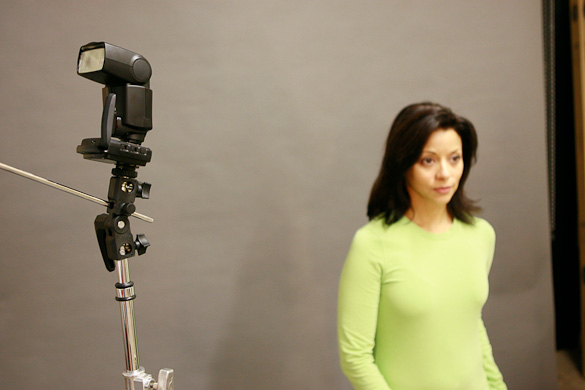
In the studio the units continued to behave as expected. By mounting a ST-E2 to the top of the MiniTT1 on my camera I was able to control light ratios right at my camera. I did a quick technical test: shoot, adjust, shoot. Repeat. Using the ST-E2 this was a breeze.


Shifting light from left to right – all from my camera.
The last test was to shoot as the sun was going down. I wanted to see if the TTL would behave as expected with quickly changing lighting conditions. My model and I drove down the road to a local park and I shot almost directly into the sun allowing the flash to fill her face.
Again, the PocketWizards behaved just fine and we were able to grab a few great shots before we lost our light.
While I had my test units I tried a few other things. Will they trigger a PocketWizard Plus or Plus II? Yes, they are fully compatible. Will they trigger your Profoto equipment with the PocketWizard built in? Absolutely. Are they small and easy to pack? Yes. Can you buy replacement CR2354 batteries at Walgreens? I did, however David Hobby found them a bit harder to find than I did. I guess my Walgreens rocks.
Speaking of batteries you’ll need to keep them fresh in your flash units. The TTL accuracy declines as battery power declines. For best results use an external battery pack. I use Quantum Turbo packs.
Another feature that’s really amazing is the ability to upgrade and tweak the units via a normal USB interface and the PocketWizard Utility software (included in the box). As new cameras are rolled out and things are improved you simply plug your PW into your laptop and do a quick upgrade. How cool is that?
I tested the units on Canon 420 EX, 550 EX, 430 EX II, and 580 EX II units. I did experience some minor issues with RF interference caused by the 550 and 580 EX II units. PocketWizard addresses this on their website:
RF noise emitted by the 430EX, 580EX and 580EX II flash units limits the reception range of FlexTT5 to approximately 50 feet when flash is normally mounted. Reception can be increased using steps described in the Instruction manual. It can be greatly improved by separating the flash from the FlexTT5 by using the Canon OC-E3 cord.
Hopefully newer versions of the units will eliminate this issue altogether.
A few other folks had the opportunity to play with these units prior to public release. Please take some time and read what they had to say as well:
The Bottom Line
If you’re a Canon shooter and a strobist this is a no-brainer. The MiniTT1 (for your camera) and the FlexTT5 (for your flashes) just makes sense. They are compatible with other PocketWizards and are small enough to throw in just about any camera bag.
If you’re a Nikon shooter be patient. Although I’ve not been given any information I’ll take a wild guess and say that a Nikon version has to be coming in the future. How soon? I have no idea, but I do know PocketWizard is always eager to be the best in every market.
If you’re a studio shooter, like me, who primarily shoots with studio strobes and an existing PocketWizard set up I think the MiniTT1 is a perfect choice. It has such a small profile that you’ll forget it’s on your camera. Chase Jarvis had some interesting thoughts on this subject.
For all the details and specs on the products check out the PocketWizard site:
And finally, here’s a groovy video to play us out.
Interactive Shoot, We’re Almost There
Our Interactive Shoot is approaching quickly. The Pro-8 arrived earlier and we’ve had some time to work with it a bit – it’s amazing. We have a few more things to wrap up before February 19th and I wanted to let you know where we stand.
Madeleine Hall. Photo Credit: The Agency Arizona.
Our models have been selected from The Agency Arizona. We’ll be shooting with Erika Shelton, Madeleine Hall (pictured above), Katie Masters, and Carly Vollmert. The models will be coming to the studio tomorrow for their fitting session with Erin Markis, the Wardrobe Stylist. Diane (MUA) will also be on hand to evaluate skin tones and start prepping the looks for each girl. Heather Blaine, our hairstylist, may also be on hand depending on her schedule. Of course we’ll shoot behind the scenes video and stills and tweet what’s going on as it happens.

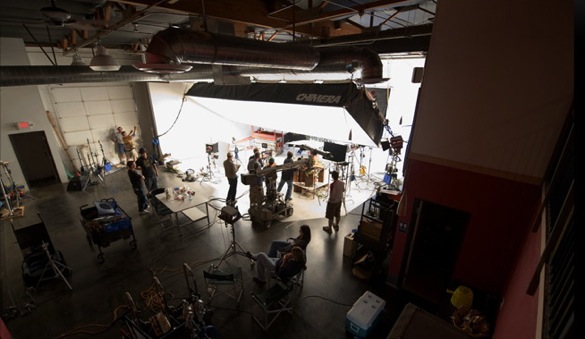
On Monday we’ll be heading up to Loft19 to do a quick run through of the shoot with Floyd Bannister, the owner of Loft19. We’ll be shooting in several locations in Loft19, it’s a huge studio and so we’ll have some options. Because we’re only shooting for 9 hours we need to make sure we have our plan in place for set changes, lighting equipment, color schemes, etc. Loft19 has a lot of equipment and backdrops and we just want to make sure we’re in sync before we arrive on Thursday. We’ll be shooting video and tweeting this meeting as well.
The final piece of the puzzle is our wardrobe. We have several designers that will be loaning us dresses and outfits but we still have a few more things to finalize before we can make a public announcement about what we’re shooting. We should have all the paperwork in place by Monday to give you an update.
There are a few things you usually need to do to have clothes on loan for a shoot. Here’s a list of things stores and designers usually want to know:
- Date and location of shoot.
- Name of Photographer
- Name of Wardrobe stylist
- Publications that will cary the images and dates of release.
- Statement in writing that shows they will be credited in articles or photos.
- Insurance policy that covers all clothing on loan.
All of this is usually written in a “pull letter” that the designer can take to stores and designers. Once the store or designer agrees to the terms the Wardrobe Stylist can then “pull” the clothes for the shoot (usually the day before or day of the shoot). Normally the clothes go back to the store the day of or early morning after the shoot.
I’ll be posting more about the shoot tomorrow. I hope all of the steps of the process are helpful to you. Let us know if you have questions or would like to know more details about anything. You can post a comment (below) or send us a tweet.
Interactive Shoot: 2-11-09 Update
The Interactive Shoot is scheduled for February 19, 2009. Here’s a quick update on the progress.
Come along for the ride…
Update: The shoot will take place Feb 19, 2009. 9:00-5:00 PST
In a just a couple of weeks we’re going to be shooting with the Profoto Pro-8 Air at Loft19 studios here in Phoenix… and we want you to come along for the ride. Let me give you a little background.
Many of you are familiar with our Digital Photography One on One videos. These are videos where you can send us a question and we create a video that answers that question. These are fun but we wanted to make them a bit more interactive.
A few weeks ago we tried something new. I posted updates via Twitter during a model shoot with Gwen Lindvig. We were posting behind the scenes photos in real-time and people were asking questions via twitter in real-time as well.
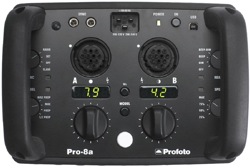
We’ve been looking for a way to put these two things together and now we have the perfect opportunity. I’m going to have a couple of Profoto Pro-8a packs in the studio over the next couple of weeks. This is a new Profoto generator that is wicked fast and since so many people are curious about it we thought we’d document our experience with the packs.
So here’s what we’re doing:
We’re going to be shooting a large production shoot at Loft 19 in north Phoenix. We’re going to shoot behind the scenes videos of the shoot and show you as much as we can including (if possible):
- Lighting Diagrams
- Using the Profoto Pro-8a Air during the shoot
- Building the set
- Working with the models (wardrobe, styling, makeup)
- Technical info
- All the lighting details
![]()
We’re also going to be giving live updates via my twitter account along the way. You can always send us a tweet to ask us a question and we’ll do our best to answer via twitter, the blog, or on the videos.
Although I can’t give you all of the details about the shoot yet, I will say it’s going to be something really fun. As we are able to disclose things we’ll update the blog or make a behind the scenes video. I predict we’ll have several videos documenting this shoot, the technical challenges, and the new toys.
Speaking of videos…
I’ll be creating a new Digital Photography One on One video that’s all about flash duration and recycle times. This will show you how you can use a flash to freeze action even at slow shutter speeds. I figured I should get as much out of the Pro-8a as I could while I have it.
We want to hear from you!
Let us know if you have questions or comments about our shoot. You can interact with us in several ways.
- Follow me on Twitter: jmarkwallace. We’ll be posting live updates, real-time photos, and taking your questions on the day of the shoot.
- Use the comments just below this post (click “comments” at the end of this post if you don’t see them).
- Watch the videos and post your video specific questions in the comments below the videos. We’ll let you know where the videos are as soon as we post them.
So when is this happening?
We don’t have the date set in stone yet, but we do know it will be in the February 18-20 time frame. We’ll let you know as soon as it’s locked down.
What the heck is Twitter?
Get Closer…
Yesterday was a tough day for Luka, our dog. He’s had a two small growths on his legs for a few weeks that we’ve been watching closely. Our vet, Dr. McComb, had examined the growths when we first noticed them and decided it would be best to monitor closely and take action only if necessary.
Yesterday morning Luka was to limping slightly and we decided enough was enough. We took him to the vet right away. Dr. McComb decided that we needed to be a bit more aggressive and so Luka was sedated and the growths removed.
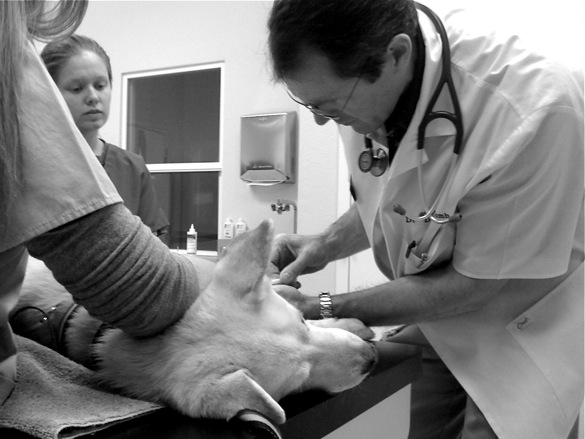
Dr. McComb working on Luka.
Dr. McComb invited us to come back to see Luka after he had removed the growths. Luka was still sedated and Dr. McComb walked us through what he had done and what we should expect.
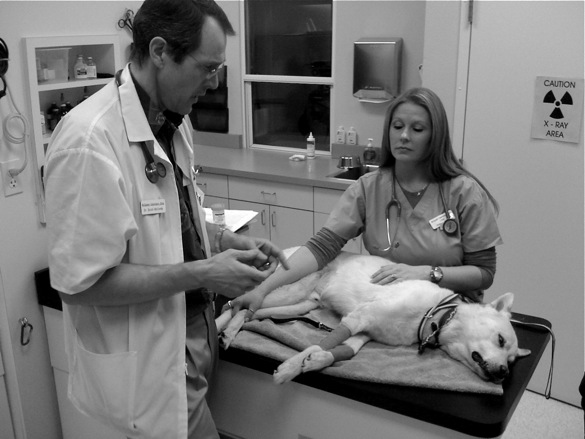
Dr. McComb and assistant Lisa treating Luka.
Seeing Luka passed out on the table was a frightening sight, and yet, I found myself with my camera in hand taking pictures. I explained this to Dr. McComb and team by simply saying, “I’m a photographer”.
Later I began to reflect on experience of seeing my pet, who I love, in such a frightening situation. My reaction was to take out my camera and start taking photos. Why?
I’m not sure there is a simple answer to that question, but I believe it’s because photography is an extension of who I am. Photography is a way for me to document, remember, share, and quantify my experiences. It’s the way I tell my version of the story.
“If your pictures aren’t good enough, you’re not close enough” – Robert Capa
Robert Capa’s famous quote is usually interpreted as the distance from camera to subject. I also think you can interpret his statement as emotional distance. I believe in putting myself close to my subject physically, and in some instances emotionally as well.
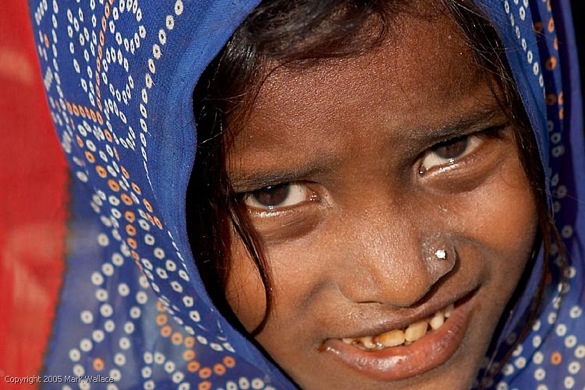
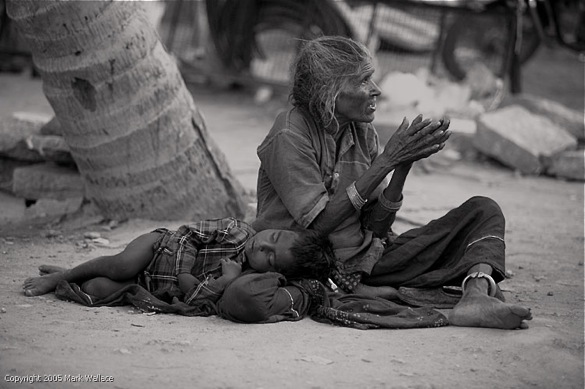
I love to travel and I’ve been fortunate enough to travel to India on a couple of occasions, both times for extended periods. India is not a place that is easy to understand. It’s so rich with tradition, beauty, wealth – and poverty. How do you capture such a place in still images?
I found that I could only begin to understand India by physically walking the streets of the towns and cities, and talking to as many people as I could. I also discovered that my photos were much richer when taken after I’d spent time getting to know my subject, even if for a few moments.
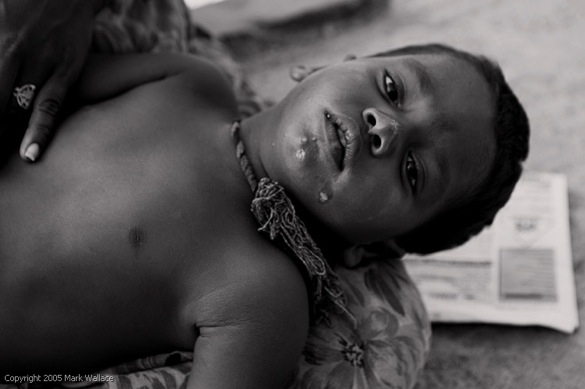
The photo of the girl above was taken after I’d had a conversation with her for a few minutes. Her face tells so many stories; the contrast between her decaying teeth (poverty) and her purple scarf (the color of royalty), the contrast of her youth and her tired eyes and skin. She’s begging and yet she has a smile behind her eyes – all things that would have been missed at a distance.
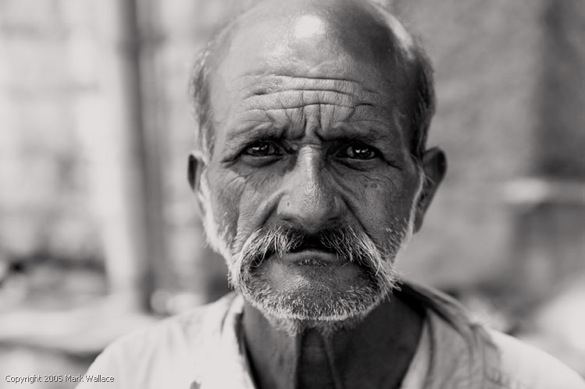
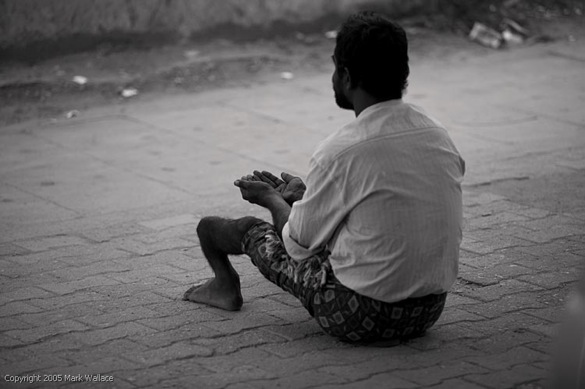
I met this man in Bangalore, India. I was walking the streets and saw the lines in his face and thought, “I have to photograph this man.” I introduced myself and we began to talk. After a few minutes I asked him if I could take a few pictures. He gladly posed as I took several photos. Could I have captured his eyes looking straight into the lens if I’d simply shot from a distance with a long lens? I doubt it. I think the interaction paid off.
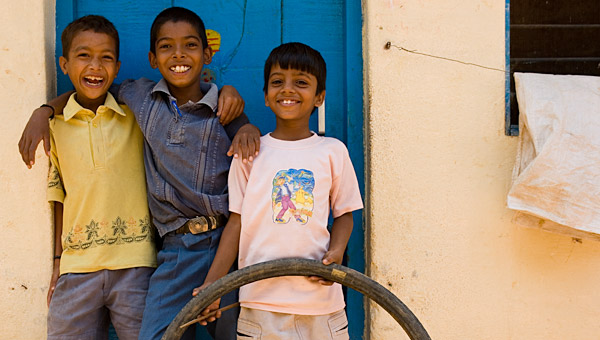
Later in the trip I asked a friend of mine to come with me as I walked through some of the impoverished areas of town. At first he balked because he thought it would be too dangerous. I told him I’d spotted a large group of kids from my hotel window, 6 stories up, and I wanted to meet them. He decided to come along.
I’ll admit I was nervous as well, but I wanted to push myself and get out of my “comfort zone”. I needed to explore this new world and to do that I’d need to push myself to do things outside of my normal routine.
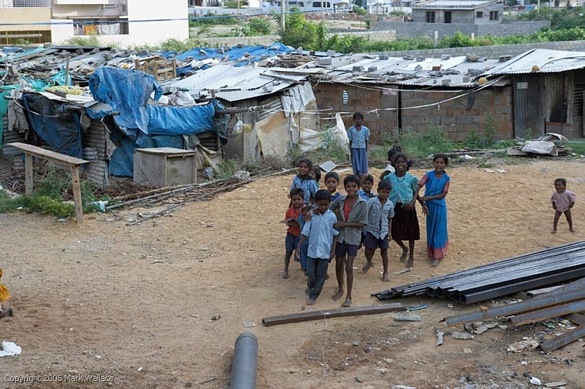
The kids coming out to greet us.
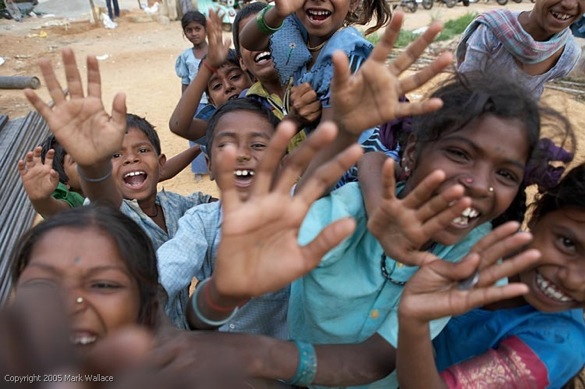
The greeting.
We spent a few hours with these kids. It is one of my best memories of India. Although these families were living in shacks with dirt floors they had dignity and joy that I rarely see in the kids in my upper middle class neighborhood here in the US. I wanted to capture that on film and so I laughed, talked, and took pictures – all at very close range.
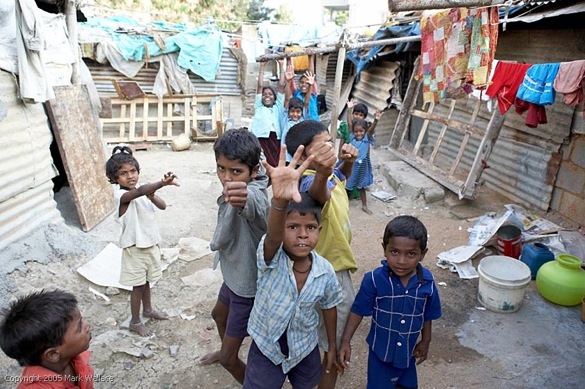
Later we walked through some of the other streets and found other equally amazing people.
It was a little intimidating to walk through some of these areas. But I think you have to put yourself out there and take some risks to grow as an artist. Putting myself physically close to my subjects and becoming involved with them through conversation resulted in some great results.
These images and hundreds of others like them have helped me share the experiences I’ve had while traveling. It’s not something I do only while traveling, I try to practice this at home as well, and that brings me back to Luka and our other dog, Sammy.
We adopted Sammy about a month before Luka. Sammy came from a very abusive background and gaining her trust was not something that was easy to come by. I made a decision I’d document our journey with Sammy and Luka in order to share it with others.
I specifically wanted to document our story with Sammy and Luka to share with the workers at Arizona Rescue who had saved Sammy from certain death and honor their gift. I would document Sam’s life with us.
I documented Sam’s life from the first day we took her home, through all of the amazing breakthroughs, and I was finally faced with a difficult decision.
In 2006 Sammy suddenly became very ill. It was a very difficult time and I had to ask myself, would I continue to tell our story through photography? I decided I would, I wanted to document her life – even to the end.
And so through Sammy’s days fighting cancer I continued to shoot. It was something that allowed me to preserve precious moments and it was cathartic. I was able to share with friends and family, who also cared about Sammy, what we were experiencing.
This is the last photo I took of Sammy, about an hour before her death.
In all of these photos I had an intent; to tell a story. Sammy’s story is of a little dog who overcame her hardships to show a grown man a few things about living. It’s a rich story and one day I’ll be happy to share it with you through my library of photos.
Take some time to forget about aperture values, shutter speeds, lens specifications, and techno babble. Your equipment is simply a tool that will allow you to capture something. The subject is what matters, not the tool you use.
What stories are you telling with your photos? How are you approaching your story? Are you challenging yourself to try new things? Are you close enough?
Sadly in August of 2009 Luka became very ill with cancer and passed away. We miss him every day. We are glad to have many photos and videos to remind us of what a wonderful companion he was. It’s a reminder to cherish every moment with loved ones and the real value of getting closer.
Pre-prod: Celtx to the rescue
I mentioned earlier that we’re working on a DVD series. When I made that announcement I knew it was going to be a lot of work. I’m a couple of weeks into the project and I thought I’d give you a peek behind the curtain to show you how I’m creating the content and let you see what the process involves.
The first DVD series will be a 4 DVD set based on my 8-week Digital Photography 101 workshop. Knowing that I’m limited to 4 DVDs on this first release gave me some boundaries and requirements. The first boundary is the time limitation. I’m limited to about 8 hours of content. Knowing that I started my next step.
I gathered all of my class materials and began to decide what would make it in the DVD series and what needed to be left for later. My normal workshop includes Powerpoint slides, videos, whiteboard drawings, printed notes, and homework. It also includes a lot of me showing things that aren’t in the notes anywhere. Step one: write down everything from all of these sources and begin to organize.
I used Microsoft Word to do this. I put Word in Outline mode and began to go session by session and catalog the topics and illustrations. Outline mode is great because it’s easy to move things around. It took about 2 weeks of work to get all of the notes together. In the end I had a solid outline of what I needed to write.
I made a decision to script everything for the video. I’ve learned that although it’s easy for me to shoot from the hip in a workshop setting that doesn’t translate to video very well. In a classroom if something isn’t clear a student can ask for clarification, in a video you have to be clear at all times.
The other reason I decided to script everything is because I need to replace a lot of the whiteboard sessions with animations or on-location examples. This means I need to plan everything in advance. Which led me to my next problem – how do I track everything? I needed a system to allow me to write, edit, rearrange scenes, plan for locations, find models, take notes, schedule everything, and plan for the final edit. I wanted to lock my system in before I started writing so I could be consistent along the way.
I decided to ask the twitterverse for help. I posted a short note on twitter and within minutes I had answers. I evaluated several screenwriting tools but only one met all of my requirements. And I mean ALL of my requirements.
![]()
Jon Diener suggested I take a look at Celtx. After taking a quick look I thought it looked too good to be true. I downloaded the software and and then watched all of the training videos. I was sold. This software is amazing – it’s a total pre-production workhorse. I can use it for this project and even use it to produce shoots. It does it all; screenplay, A/V scripts, storyboards, notes, scheduling, tracking actors, props, CGI to be created, shot lists, and more. It has robust reporting and is easy to use.
Celtx is something every content creator should take a close look at. It’s more than just a tool, it’s a community. Check out their blog for more info.
I will be working for the next two or three weeks to finish all of the pre-production work. I don’t mind spending a lot of time planning the work because I know that every minute I spend in planning and preparation I’ll save myself 4 minutes of frustration later on.
Once the planning and prep are all finished we’ll get to business shooting. We’ll be shooting everything with a Canon XH A1 and renting additional cameras or gear when needed. Everything will be edited in Final Cut Studio and output in HD. I’ll post more on the production workflow as we tune that in.
ImagingUSA Videos
Here are three videos that we shot at ImagingUSA this year.
ImagingUSA 2009: Part One from Mark Wallace on Vimeo.
ImagingUSA 2009: Part Two from Mark Wallace on Vimeo.
ImagingUSA 2009: Part Three from Mark Wallace on Vimeo.
Twitter shoot

Gwen Lindvig by Mark Wallace. Copyright 2009 Mark Wallace/SnapFactory
Today I had a terrific shoot with Gwen Lindvig. At the last minute I decided I would give real-time updates via Twitter. It was a lot of fun and a lot of my twitter friends enjoyed it. I think I may do this again but I’ll do it a bit differently.
Things I liked:
- People were asking questions via Twitter during the shoot. I was able to answer and even snap iPhone shots to illustrate what I was doing.
- People were talking about things real-time. It was a blast to have a group talking about things as they progressed.
- It was great to take snapshots of the lighting setup and then show the results so quickly.
Things I’ll change:
- I’ll probably create a Twitter account just for the live updates. I’m not so sure EVERYONE wanted to get so many updates.
- It was a spur of the moment idea. Next time I’ll make announcement so people will know in advance.
- It was too much to shoot iPhone updates, tweet, and conduct a photo shoot all at the same time. In the future I’ll have a dedicated “reporter” shooting and typing updates for me.
Thanks for everyone who joined in on the fun. Let me know if you have suggestions or comments.
Diane was the makeup artist today and did a stellar job. Our model was Gwen Lindvig. I’ll post some of the photos once they’ve been retouched.
POV shooting…
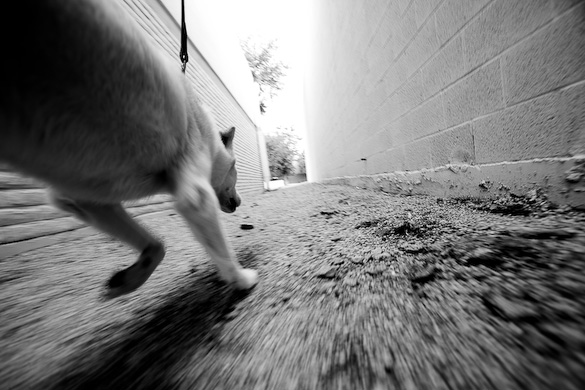
A bunch of people have responded to yesterday’s video about the “Luka-Cam” asking for more information. The Luka-Cam video will be included in a much longer video about PocketWizards that will be finished in a couple of weeks. So until then I suggest you check out these two terrific resources.
Chase Jarvis TECH: POV Photography. In this video Chase walks you through his process of creating “killer point-of-view (POV) images.” This is a great video and the page also has some video stills to help illustrate the details.
PocketWizard: Behind the Scenes with Jack Reznicki. This video will show you how to use a pocket wizard to trigger your camera. It’s three minutes of fun.
In the video I used two PocketWizard Plus II transceivers; one on the camera and one in my hand. The PocketWizard in my hand triggered the PocketWizard on the camera which in turn told the camera to take the picture.
I also used a pre-trigger cable from the PocketWizard to the camera. This is a special cable that keeps the camera “alive”. It’s just the same as holding the shutter release button halfway down. Check the PocketWizard site for the cable that matches your camera.
The Magic Arm is made by Manfrotto. B&H Photo has a Magic Arm Kit that is a great deal. The whole thing is just under $140.
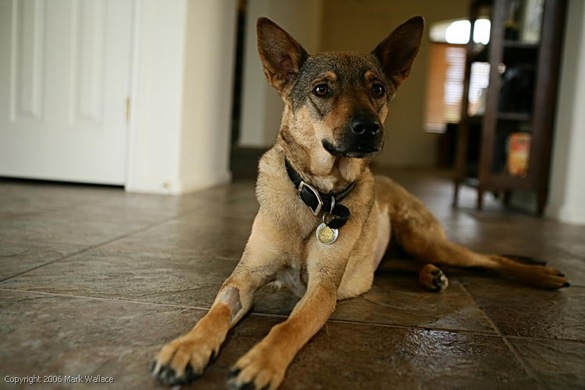
The most important part of the photo shoot was, of course, Luka. Luka was rescued by Diane in 2005 and he’s a big part of our family. We are very pro-adoption and encourage everyone to adopt a pet if possible. Check out PetFinder.com and skip the mall pet stores forever.
If you live in the Phoenix Metro area we highly recommend two local charities: The Arizona Humane Society and Arizona Rescue. Diane spends almost every saturday at The Arizona Humane Society with her camera at her side. She takes many of the wonderful photos you see on their site. It’s amazing how much good a photo can do. Almost every dog she photographs is adopted.