Category Archives: Behind The Scenes

Video Progress

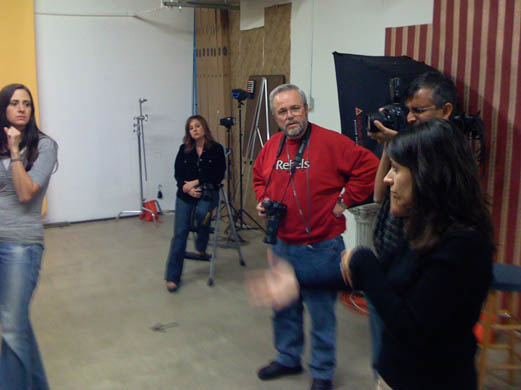
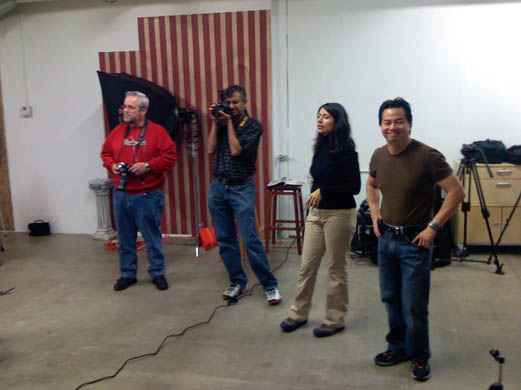
This weekend I shot a couple of videos of students talking about their experience with the 8 week Digital Photography 101 course.  Eventually I’ll have a bunch of videos that will all be edited and posted on our website.

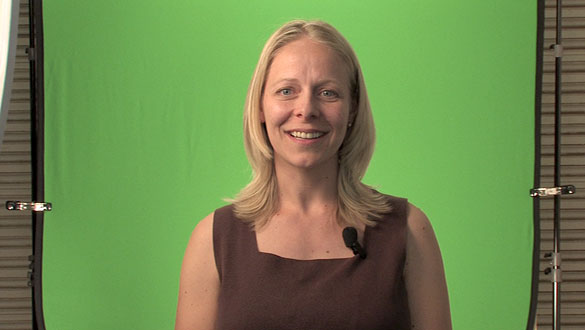
I’ve had a few people ask about the process of shooting on a green screen and so I thought I’d create a short video that shows the editing process.

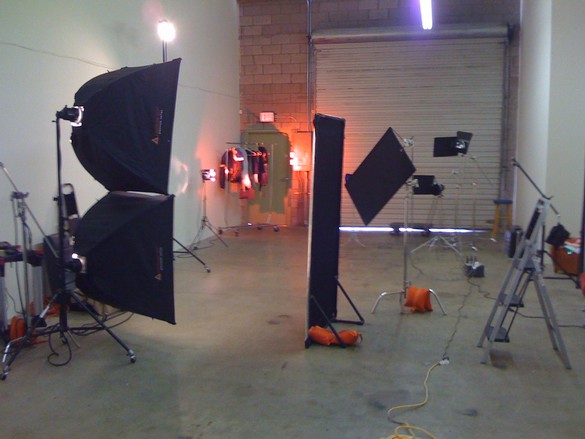
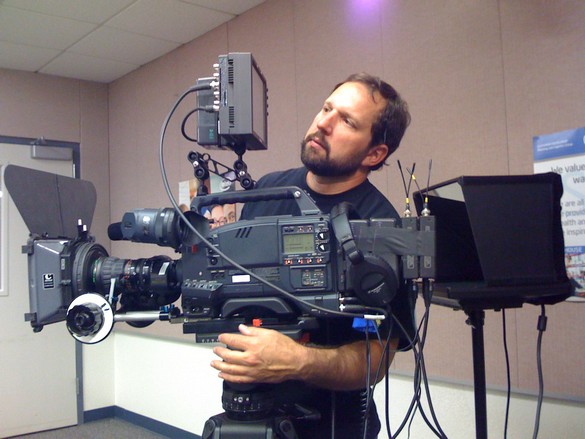
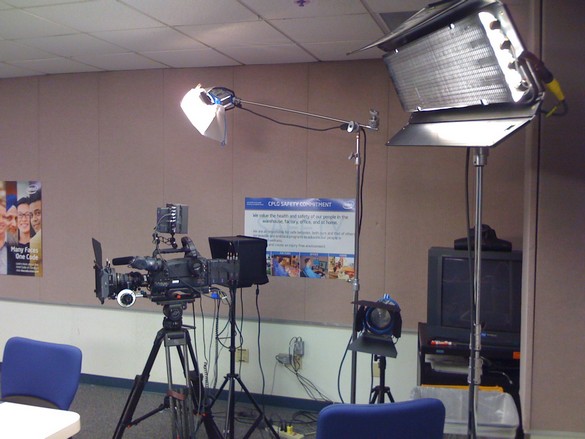
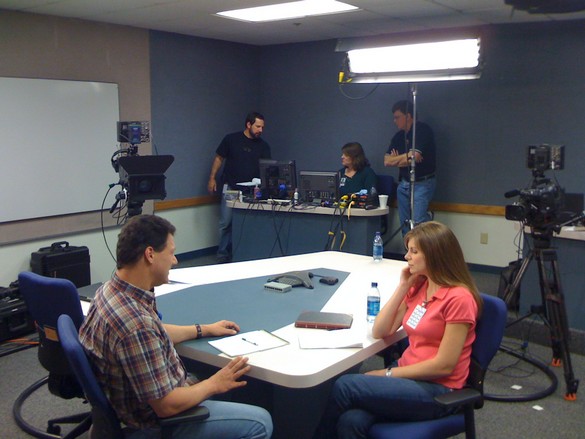
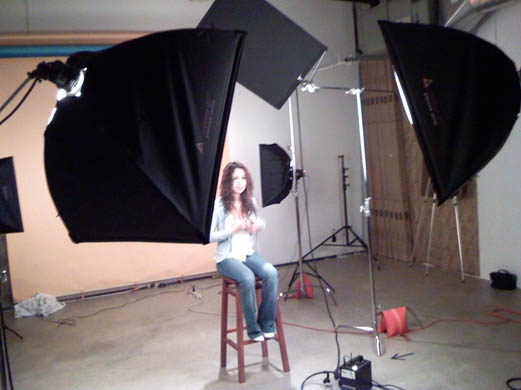
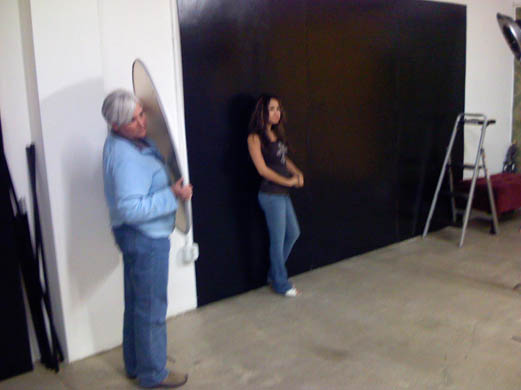
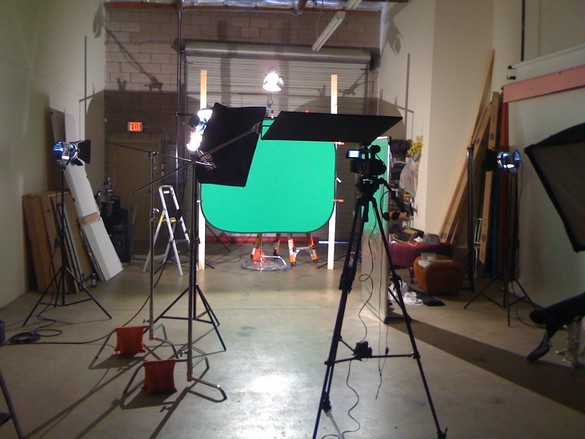
Here’s the lighting setup.  I have a portable green screen that’s lit by two Arri 650 Plus fresnels.  The subject is lit by an Arri 1000 watt Arrilite with small Chimera softbox.  There’s also a 650 fresnel that I use as a separation light – that’s the light high above the green screen.

There’s a silver reflector opposite the softbox for some fill light.  There are also two flags to keep light from spilling into the lens.  One large flag to block the separation light and one small flag to block the light coming from the rear of the softbox.

IMG_0724

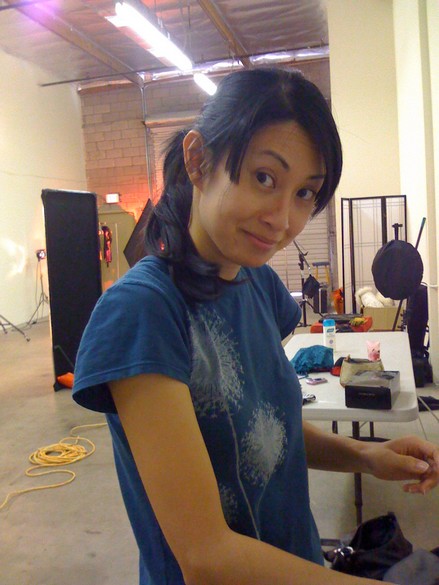
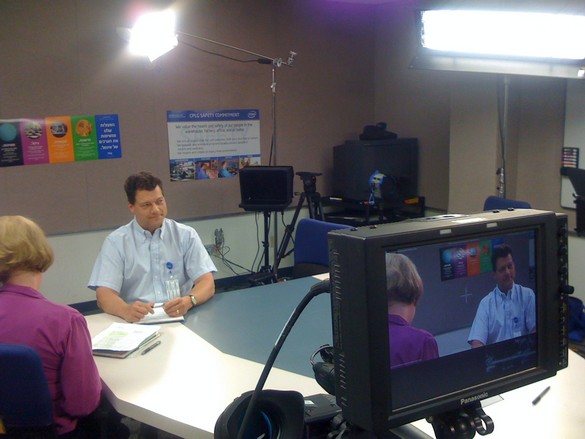
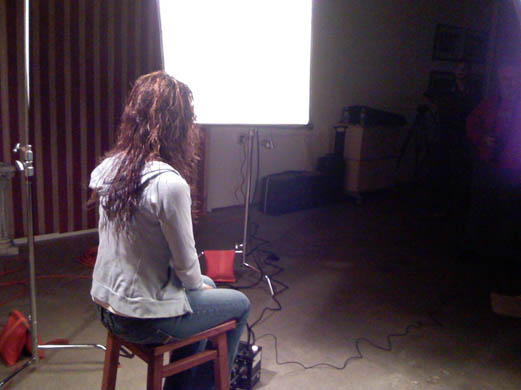
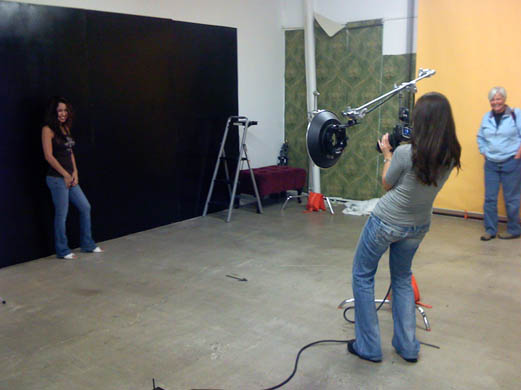
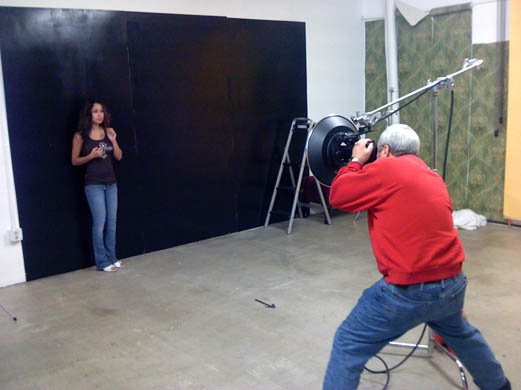
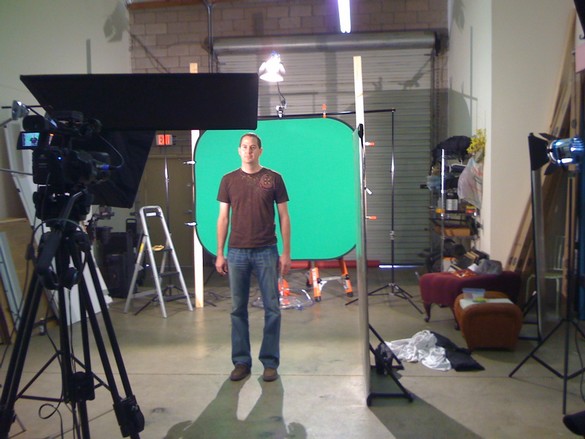
Here’s another view with our former student, Craig, in the shot.

IMG_0726

After the video is shot with our Canon XH-A1 it’s imported into Adobe Premier Pro CS3.  I use a Matrox RT.X2 video capture card for real-time HD editing.  The basic steps shown in the video are:

  1. Add Chroma Key to reveal stock background animation.  You can buy these from Digital Juice, they’re called Jump Backs HD.
  2. Add left matte to eliminate the green screen stand.
  3. Clean up the audio in Adobe Audition.
  4. Add some stock music from Digital Juice.
  5. Add the right matte
  6. Adjust the color
  7. Move Craig to the right to make room for text.
  8. Add some text.
  9. Fade everything out.


From Green to Finished from Mark Wallace on Vimeo.

Post Game

I was hanging out at Chase Field again yesterday and was able to catch Fox Sports recording the post game show.  The setup was fairly simple.  A single camera on a jib, two HMI open face 2k lights with Chimera softboxes, and some lavs for sound. 

Since I’m a big fan of behind the scenes photos I thought I’d share the setup for others to glean some insight as well.

IMG_0718[1]

Behind the camera with Steve Carell

There’s a very cool article at the Wired web site.  It combines four things that I enjoy a lot; Photography, Wired Magazine, Steve Carell, and Lost In Translation (true fans will find the obscure reference).

Photographer Brent Humphreys drew sketches while squeezed into a window seat on his flight to shoot Steve Carell. “The upshot was those little napkins provided me with a sense of confidence and control,” Humphreys says. “Of course, the flight attendant thought I was crazy and so did the passengers next to me when they finally woke.”

Click here to see the sketches and photos.

First Shoot in the new studio

We’ve been busy moving all of our equipment from the old studio to the new studio.  We’re still waiting for the new furniture and a bunch of odds and ends before we call it finished.  I took a “break” during our busy weekend and shot a few photos for my portfolio.  Since Diane was busy working on a shoot at ASU I asked Caroline Diep to come along and assist.  She did a fantastic job.

Our model, Angela, was terrific to work with and we got some stellar shots.  I’ll post a few once I’ve finished with the post-production work.  Here are a couple of shots from my iPhone.

IMG_0614
With 60 feet of shooting space we were able to add some color to the background and drop it out of focus for a quick and easy glamour look.  I had a bunch of lights shooting toward the camera so I had to use a lot of flags.

IMG_0615
My super helpful assistant, Caroline, who is normally in front of the camera.  She’s a Ford Model and it was a trip having her help out.  Thanks Caroline!

Remodeling

The construction crew started work on our new studio today.  The front area is being converted into our new classroom space.  This requires the crew to remove a few walls, fix up the ceiling, and put down new carpet.

We’re also having a new door installed in the bathroom so it can be accessed from the classroom or the studio.  This is no small task since it requires all of the plumbing to be updated in the wall where our door is going in.

We’re also having a 4–ton A/C unit installed in the studio so our clients and models stay cool during the hot summer months here in Arizona.  Of course we need the A/C unit to be out of the way so that means the existing lighting has to be moved so the ducts can be installed in the correct locations and kept to a minimum height of 12 feet.

I snapped a few photos with my iPhone while I was meeting with the contractor today.  We expect everything to be finished in about 10 days.

IMG_0583
Workers begin tearing out the walls.

IMG_0589
Don, the supervisor, instructs the air conditioning company about our needs.

IMG_0593
Workers trying to figure out how they are going to install our new bathroom door.  The problem is all of the plumbing in the wall that attaches to the sink and hot water heater (hidden from view).

IMG_0595
Progress on the wall removal.

IMG_0594
This guy was re-routing all of the electrical that used to be in the wall.

IMG_0591
This trailer was inside the studio and was used to store all of the material they were ripping out of the front room.

IMG_0590
Although it looks small the studio is actually 60 feet front to back.  It’s going to be nice having a bit more space.

Fun Video

The last class in our 8–week Digital Photography workshop was last night.  I’m bummed that this workshop is over because the group of students was just so much fun.  We learned a lot from each other and I saw some terrific photography.

Rose-green-screen
Rose in front of the green screen.

After that class I asked if anyone could stay after to give their impressions of the last 8 weeks.  Almost everyone had to zip home but Rose was able to stay after and give us some feedback.  I’ll be catching up with other students in the near future to get their feedback but I’m happy about the little video we shot last night.  Thanks Rose!


Digital Photography 101 Testimonial from Mark Wallace on Vimeo.

Corporate Video

I spent the day helping Intel shoot a little training video. They had cool toys and I was able to learn a few things that will help improve the quality of our Digital Photography 1 on 1 videos. Here are some iPhone snapshots.

IMG_0563
Jeff setting up one of two Vericams.  Jeff is a former student of mine and has helped us a lot with our Studio Lighting 1 on 1 videos.  Jeff shot all of Episode 6 for us and has loaned us his personal lighting equipment on several occasions.

IMG_0564
Lighting was a mix of Kino Flow and Arri.

IMG_0566
Actors Gene and Natalie rehearsing in the foreground.  In the background is Jeff (DP), Kristi (writer), and Michael (Director).

IMG_0567
I was operating one of the Vericams and shot this between takes.

New episode on the way

Cute-luka

We just finished shooting the latest episode of Digital Photography 1 on 1.  I’ll be discussing the differences between wide angle and telephoto lenses for portrait photography.  I’m excited about this episode because Luka makes a special appearance!  Yep – Luka will be a guest in his very own Milk Bone inspired segment.

I’ll be editing tomorrow and should be finished by Wednesday at the latest.  I’ll let you know when it goes live.

Camera Bag

Someone recently asked if I could describe the gear that I normally carry in my camera bag.  Here’s a quick look at my normal setup.  I have different setups based on what I’m doing, I would never take this much equipment on a travel assignment, but if I’m shooting locally this is what I carry.

All of my lenses are Canon.  The sensor brush kit isn’t sold anymore but you can get something similar from Visible Dust.  I basically have the old version of the Arctic Butterfly.  The Epson P-2000 has also been upgraded with a new gadget from Epson.

The space under the top strap (between the 16–35mm and the 85mm) is usually filled with my MP3 player of the day.  I forgot to list that at the time I made this diagram.

The bag is a LowePro CompuTrekker AW.  It’s on wheels so that makes carrying so much gear bearable.

Camera-Bagb

Yes, everything is insured.

I’m going to be publishing a new Digital Photography 1on1 video that is all about bags and packing.  I’m going to be out of town a lot in the next month.  I’ll be in Portland and New York City and then back home.  I’ll try to publish it before I head to NY, but if not I’ll just add some NY footage to the episode!

Studio Lighting 101 + iPhone = fun.

We had a great time in our Studio Lighting 101 workshop yesterday.  We had a great group of students.  During the workshop I took some snapshots using my iPhone just for fun.  Here’s a low resolution look at some of the fun.

IMG_0201

The first lighting setup of the day.  This was a basic 3 light setup with a two lights added to give the background a bit more light.  We mixed our Profoto equipment (foreground) with our student’s equipment (background lights) to illustrate how to mix and match lights.  Our model, Amanda JoLynn, sits patiently while we discuss the different options.

IMG_0202
Another shot of Amanda, this time from the reverse angle.

IMG_0203
Students Johanna and Praveen makes some adjustments to the lights for one of the setups.

IMG_0206
Students shooting Amanda.  Praveen, Johanna, Dave and Hartono are shown.  I think those are Angie’s hands just to the right.  The white blob is our studio dog Luka.

IMG_0214
Diane gives some pointers to the students.  Left to right; Angie, Stacy, Dave, Praveen and Diane.

IMG_0215
Johanna holding a reflector.

IMG_0212
Angie saying, “WOW! I love the ring flash!!”  Amanda smiles in agreement (every model loves the ring flash) and Johanna agrees in the background.

IMG_0213
Dave getting in on the ring flash fun.  It’s just too good to pass up!

IMG_0217
Dave, Praveen, Diane and Hartono.

Yesterday was a lot of fun.  Thanks to such a great group of students. We’ll be adding more workshops in 2008.  We’re working on the schedule and will be posting it soon.  I hope to see a lot of new faces in the coming new year.