All posts by Mark Wallace

Mark is a traveler, photographer, and writer.

Making the switch to liveBooks

logo-livebooks.gif

Earlier this week I mentioned on Twitter that I was making the switch to a liveBooks Professional Unlimited portfolio. I had a lot of responses from people telling me about alternatives, many photographers believe that liveBooks is overpriced. So why would I spend thousands of dollars on a web portfolio? A lot of reasons, let me break it down for you.

Time

I’m pretty tech savvy; I know C#, javascript, CSS, SEO, Ajax, SQL, ActionScript, etc. I used to work for Intel as a Senior Application Developer and I know my way around IIS. And because of that experience and training I know that building a solid web presence takes skill and time. I’ve built all of our current sites and even created a flash site for my portfolio to emulate liveBooks. But my version needs a lot of work to optimize it for speed, it needs more features, it needs to be updated for SEO. All of this takes time that I don’t have.

Speed

liveBooks is fast. The large images are served up quickly. They have web servers that are optimized for their software. I don’t have to worry about administering permissions and patches and everything else that comes with hosting your own site. It also has a complete back-end for managing content. With many portfolio packages you have to worry about sending files via FTP and some even require that you create thumbnails manually and fiddle with XML files for content structure. I don’t have time for that.

Search Engine Optimization

liveBooks has automated tools to help me reach my audience. Metadata is uploaded automatically. An HTML page is automatically created “behind” the flash site so Google and other search engines can index my content. I can add keywords and more. This is a huge advantage over other flash portfolio sites. If customers can’t find you then what good is having an awesome site?

Note: for a great presentation about SEO by Matt Hill click here.

Shopping Cart

I shoot fine art photos that I sell in galleries. I’d like to offer those prints to customers online. liveBooks has an integrated Shopping Cart feature that will allow me to do just that. It’s even integrated with PayPal so I don’t have to do any extra work to handle the transactions.

Password protected client areas

I am regularly creating content for projects that I don’t want the world to see. Ideas for sets, locations, model proofs, etc. Currently I have a way to manually create password protected areas on our site, but it’s not fast or easy. liveBooks allows you to create content, upload via the editSuite, and password protect that content just for clients. It’s the perfect companion to my pre-production and post-production workflow.

Comp Card and PDF portfolio

Two other great features are the ability for clients to print a comp card right from my liveBooks site. Clients can also download a PDF of my portfolio to keep on their hard drive. These are just two more ways the site will allow me to attract customers.

Data, data, and more data

At SnapFactory we track everything using Google Analytics. This is terrific on our normal HTML pages but we can’t really track details on our portfolios and if you ever need help with your data then visit the site for more information. liveBooks has support for page-by-page tracking so we can measure what people are looking at and what we need to update. We also make sure to use the best data management software systems from websites like https://blog.couchbase.com/dates-timestamps-timezones-comparative-study-oracle-n1ql-support-date-time-feature-part-1/.

The editSuite

One of the biggest issues I have with my current portfolio is that it’s a pain to update. I have to size the image, create a thumbnail manually, open a connection via FTP, change my XML files (and hope I don’t fat finger something or my whole portfolio dies), and then upload all my content to the site. Vertical images (the bulk of my work) take an entire slide unless I manually combine two vertical images in Photoshop. If I want to change the order of my images I’ll need to open the XML file and do it all manually. There’s no 5 minute update on my current site.

In liveBooks they’ve created the editSuite to handle most of this work for you. I’ll still have to size the image in Photoshop* but the rest is butter. I can bulk upload images or upload them one at a time. I can rename menu items, drag and drop to rearrange my images, and vertical files will show up side by side with no Photoshop work. Yes!

I can create custom pages and upload via the editSuite. I can even upload video content. Now that’s what I’m talking about! Just let me create and post. I don’t want to spend time acting like a web administrator – I’m a photographer.

*liveBooks will actually resize images for you, but it’s not recommended.

It looks great

The liveBooks team is currently working with me on my site design. I’ve answered a few questions and told them exactly what I want my site to do. Now they are taking all of that information and cooking up a new design just for me. With all of the features I’ve mentioned earlier this translates into a great looking site that will remain fresh.

It’s more than a portfolio

As you can see liveBooks is more than a simple portfolio. It’s a tool for conducting business and driving sales. After looking very closely at many different packages I thought that liveBooks was the best for me. I did a lot of reading a talked to other photographers who use liveBooks to make sure I’d get a return on my investment.

Corey Miller at liveBooks helped me with all of the information and spent a lot of time answering my questions. If you’d like to know more about liveBooks I suggest you give him a call: 714-408-4543 or send him an e-mail: corey@livebooks.com

Update: liveBooks does work on iPhones and other non-flash devices. If you have an iPhone and surf to a liveBooks page it will ask you to click for the HTML version. It’s a bit clunky but it works just fine.
Savage-TED

Don’t miss the point…

In every one of my Digital Photography 101 workshops I give students an assignment that strikes fear in the heart of many. I give students three weeks to find a photographer that inspires them and then give the class an oral report about that photographer.

The oral report is limited to two minutes per student. But the point of the assignment is not the oral report, it’s the research and exploration. The assignment is about discovery. Some students wait till the last minute and put a terrific oral report together the night before it’s due – but those students miss out.

I ask students to list the themes of their chosen photographer, look at their style, what type of lighting do they use, what is their subject, etc. Most importantly, I ask them why they identify with their photographer. I ask them to look at the photographers their photographer was inspired by. It’s awesome to see over the weeks how students make new connections and find photographers and styles that really inspire them.

One of my current students, Mark, did a bunch of research and when he found the photographer that he identified with, Tyler Stableford, he sent him an email and interviewed him. Tyler gave him a bunch of great information. Mark took the information and tried some new things. Mark gets it.

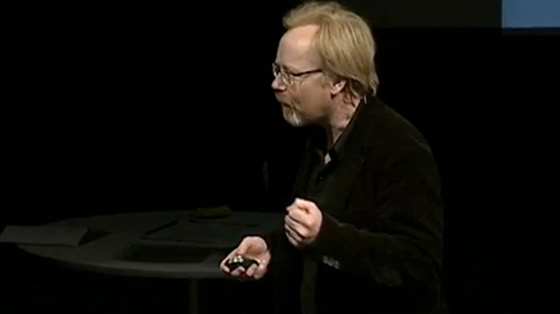
Today I was watching some TED videos and saw this talk by Adam Savage. Adam perfectly illustrates the objective of my assignment. Take a look and then get out there and enjoy the journey.

How Much Should I Charge?

“How much should I charge?”, it’s a question I hear all the time. I hear it from students who want to make the jump from hobby to professional, but I also hear it from many new professional photographers. Take a look at any photography forum and you’ll see it’s a hot topic. I’ve also found that the vast majority of photographers won’t even talk about the subject. Let me pull back the curtain and give you some insight.

Before I begin let me say that what I’m about to describe is not the only way to do this. I hope this post will spark some conversation and I invite your feedback and insights. This is the way I do it and I’m happy to share.

I’d also like to say that I’m opposed to the old-school thought of having a standard rate that all photographers use. The thinking is that if you charge $20 for the same thing that I charge $200 for I’ll go out of business because you (and all the other $20 photographers) will drive rates down across the board. I think that’s ridiculous, hopefully the practices I describe below will explain why.

First let’s figure out what we’re trying to do here. You want to know how much to charge. You need to figure out your rates. You want to have fair prices but you also want to make a profit. Where do you start?

For a moment let’s forget about the fact that you are a photographer. You are in business and you have goods and services to sell. The same principles apply to your business as the person selling widgets down the street. You both have costs. You both have supply and you both have demand (or the lack of demand) for your products.

What are the “widgets” that you are selling? There may be more to what you are offering than you realize. When you show up for a job and take a photo what does the client get out of the deal? Let’s list a few things:

  • Your time
  • Your experience
  • A standard of quality
  • Your style
  • Media of some sort (prints, CD, etc.)

Of all of these things the only constant is time. One hour of my time is the same as one hour of your time. An hour is an hour. But what does the client get during that hour? Everything else is variable and will change as you grow as a photographer. You’ll gain experience, your style will evolve, the quality of your work will increase. Therefore an hour of my time is not the same as an hour of your time to the client. They won’t get the same thing from that hour.

Now let’s chat about a very important concept: the daily cost of doing business. What are your costs? You absolutely have to have an understanding of your costs or you won’t survive. Let’s take a look at some of the most common costs:

  • Salary
  • Retirement
  • Health benefits
  • Taxes
  • Rent
  • Utilities
  • Equipment
  • Depreciation on equipment
  • Insurance
  • Accounting fees
  • Bank fees
  • Credit card processing fees
  • Expendables (gaff tape, seamless paper, etc)
  • Office expenses
  • Phone, internet, cell phone costs
  • Travel costs (even if your working local)
  • Meals
  • Talent
  • Assistants
  • Clothes (you have to look nice at that wedding, right?)
  • Web hosting costs
  • Ink, paper, etc.
  • Software licenses

This list can get to be pretty long and the one thing I didn’t include is time. Time is your most valuable asset and highest cost – never forget that.

It’s a good idea to actually write down every single cost you have. Use a spreadsheet. Really figure it out. The best way to understand your costs are to track them over time using accounting software. We use Quickbooks online and love it. The longer you’re in business the better you’ll understand your costs.

OK, now take all of your costs for an entire year and divide that by the number of days you plan to work, this is usually 250 days per year. This is your “daily cost of doing business” or DCODB. Now you have a realistic place to start when figuring out your rates. This is the rock bottom number that you have to bring in every single day of work. If you don’t know what your DCODB is then you should get cracking on the books. You must know this number!

DCODB is going to be different for different people. If you’re a stay-at-home mom who shoots kids portraits your retirement and benefits are probably covered by your husband. If you don’t own a studio your rent is lower and your insurance rates are different. You get the idea.

For the sake of argument (and easy math) let’s say your DCODB is $80. If you work an 8 hour day you need to pull in $10/hour just to cover the bases. For the record – I hate figuring hourly rates – but that’s another discussion in the future.

Now that you have your DCODB it’s a bit easier to give a fair price. If someone asks what you’d charge to come shoot for a day you can use a simple formula:

DCODB + shoot costs + markup = rate.

Let’s put it together. Our pretend client wants you to come to their location for a couple hours one morning and shoot their antique car collection. And while you’re there why not throw in a family photo in front of the old Tucker? How much would that be?

You know your DCODB is $80 but what about the other costs? Again, don’t do this in your head, do the math and get it right. This is why photographers who’ve been around a while won’t give you an answer on the spot, they need to calculate the cost and give you an estimate. Quickbooks is terrific for this – it’s built for it. Let’s break down the estimate.

The shoot is only going to take about 2 hours, so you should charge $20, right? Wrong. You’ll have to drive to the location, setup, shoot, and then drive back. There are hidden costs – transferring the photos, unloading the car, etc. At the very least you won’t be able to book anyone else for the morning. You need to begin with a half-day rate: DCODB/2=$40.

What about other costs? Let’s add those up (with bogus numbers):

  • Assistant: $20
  • Rental for gear you don’t own: $5
  • Gas used to get to location: $1
  • CD for comps: $1

Total *real* cost is: $67. But you are a terrific photographer, the client loves you, and you do amazing work. Five other people want you to shoot at the same time for the same thing – demand is high – supply is low. You can add a few dollars because your perceived value is high. But what if you’re just starting out?

Nobody else knows you exist, your work is OK at best, you’re just cutting your teeth. Maybe you should just shoot for free to get the experience, correct? No. At least charge your real costs. If you don’t you’ll be out of business soon. You can always lower your real costs by paying yourself less, skipping the assistant, etc.

You should always meet with your client before the shoot (even if it’s on the phone) to determine exactly what they expect as the outcome of the shoot. In the above example the family may want a full sized framed portrait for the family room. Did you include that in your estimate? Are you marking up what Whitehouse is charging you? Did you take in to account the time you’ll spend in post production getting the file ready for print? Are you considering paper and ink costs? Track your expenses!

What about licensing fees? If you shoot for a commercial client you’re rate structure will be a bit different:

DCODB + shoot costs + post production + licensing + markup = fee

We normally bill post production as half day increments depending on how much work we have to do or we contract graphic designers/retouchers to do the work and pass the bill+small markup to the client.

Licensing images can be sticky. We use a very simple formula for figuring this out. We ask our clients to show us the numbers of the total media buy and we use a sliding scale. Let me explain using hypothetical numbers.

Let’s say the client is buying advertising in 4 magazines, one billboard, and 20 mall banners. The total media buy is $40,000. We charge a percentage of that amount. For the sake of argument let’s say that percentage is 10% because it’s a mid-sized campaign. Our licensing fee is then $4,000.

But let’s say it’s a small client and they are just going to buy an ad in the local newspaper for $300. Our percentage would be 20% and cost the client $60.

If our client was huge and the media buy was $1,000,000 or more then we’d charge a smaller percentage, around 3%. The licensing to the client would be $30,000.

We like the sliding scale method for determining licensing. It’s easy for the client to understand and put in their budget. What the actual percentage is and how long the images are licensed are things we look at closely and are a part of our corporate strategy. I can’t share specifics but you have enough information to understand the principles and go forward.

I hope this gives you a start on determining your rates and pricing. To get solid advice for your specific business needs I suggest you do a few things:

  • Hire an accountant to help you get started
  • Use Quickbooks to track everything
  • If you don’t have a grasp on basic economic principles then get some help or take some classes. Do you know what ROI is? Do you know how economies of scale effect your buying power and pricing? Do you know what depreciation is? Do you have an EIN? If you’re unsure about any of these things you should get some help from a professional number cruncher.
  • Join Professional Photographers of America and enroll in Studio Management Services – it’s business school for photographers. Why are you hesitating? Click the link and enroll. It’s worth it.
  • Read Picture Magazine – it has great business advice.

This article is by no means extensive. You’ll need to do the work to fully understand the business you’re in and set appropriate rates. You’ll be tweaking your rates until you retire.

If this article was helpful to you please let me know. This is just one part of the business of photography. You should also have some understanding of marketing, if you don’t understand then you should contact white label seo for some assistance. You should know how to calculate your ROI (return on investment) for everything you do. This will help you fine tune your business and stop doing things that make some money for those that make lots of money. Additionally, getting some help with site selection for your business could really help your business, you may want to consider this as an option.

Happy shooting and number crunching.

Quick Update

It’s been a very busy couple of weeks for me. Unfortunately it’s been so busy I’ve neglected the blog for a bit. So what’s been keeping me so busy? Here’s a quick recap.
IMG_0420.jpg

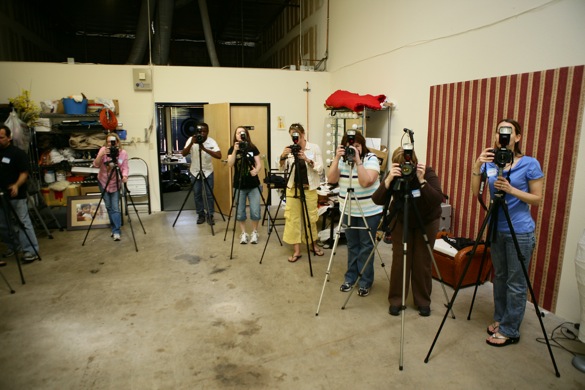
I taught my Studio Lighting 101 workshop on February 21st to a sell-out crowd. We had a blast shooting and learning all about light. We have another workshop coming up April 11th.

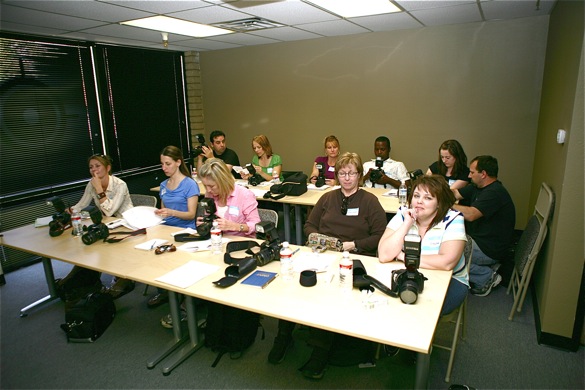
The next weekend I taught my On-Camera Flash workshop. We had another sell-out crowd.

WQ2U0999.jpg
Students practice balancing ambient light with their flash.

WQ2U1010.jpg
Students take a quick break during the on-camera flash workshop.

mark-window.jpg
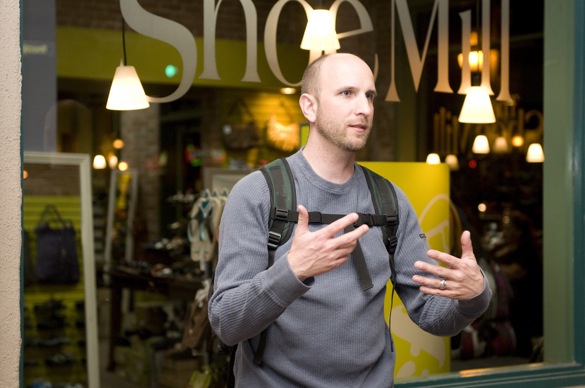
Yours truly talking about night time photography on Mill Ave. Photo: Fernando Ramos

During the week I was also teaching my 8-week Digital Photography 101 workshop. Yep, lots of teaching this month. Lots of fun.

I’ve also been busy working on a few on-going projects. I’ve been editing new episodes of our Twitter Interactive shoot, the next episode will go live soon.

I’ve also spent a good amount of time working on the Digital Photography 101 DVD series. The pre-production is a lot of work and I’m making solid progress. I want to get them out as soon as possible but I also want to make sure they are outstanding quality. Thanks for your patience.

I’ve also got a brand new Studio Lighting conference in the works. I’ve been working closely with Loft19 studios to create an all new studio lighting training experience for beginning and advanced photographers alike. I’ll be hammering out details this week and posting details as soon as I can.

And, finally, I’ve been working to put everything in place for a bikini promotional shoot. I’ll be shooting images for billboards, banners, and catalogs. Of course we’ll be tweeting the shoot. If you’re on Twitter please follow along. March 14, 9:00-5:00 PST.

Of course you can always keep up to date on all the details of our busy studio by following along on Twitter: www.twitter.com/jmarkwallace

Twitter-Interactive: What a blast!

twit-interactive.jpg
Photo by Danno of The Photo Collective

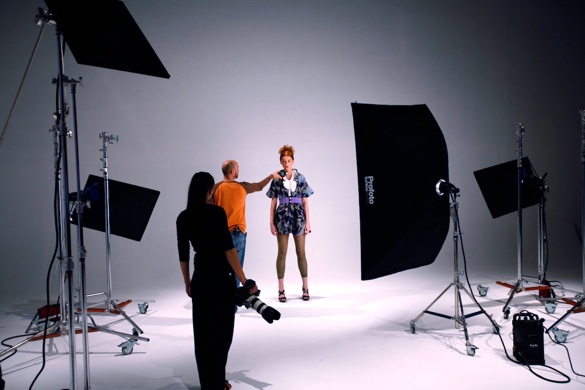
We had a blast shooting at Loft19 yesterday. We are going to spend days sorting through all of the photos, questions, comments, and videos. Once that’s done we’ll be creating a series of videos to demonstrate each step of the production.

You can view a Flickr photo set of the entire day right now. We’ve captioned everything so you can understand what’s happening.

Click here to see the photos.

The Profoto Pro-8 Air was amazing. It’s impossible to describe how fast it is, so here’s a 16 second video that was a part of the shoot yesterday. In the video you can see some of the flashes, but the video camera couldn’t capture everything. Every time you hear the shutter release on the camera the flash actually fired. The amazing thing is that the strobes could have gone a twice that speed. We were shooting at 10 frames per second, but the strobes can fire at 20 frames per second. Just amazing.


Profoto Pro-8 Air Sneak Peek from Mark Wallace on Vimeo.

I’ll be teaching my Studio Lighting 101 workshop tomorrow and then taking a much needed day off on Sunday. Look for new information to appear Early next week.

Twitter-Interactive: Meet The Team

UPDATE: Thanks to all who joined us. We’ll be updating the blog 2-20-09 with thoughts from today.

Our Twitter-Interactive shoot is tomorrow. I’m so excited that if I was a cheerleader I’d be doing spirit fingers. Ok, bad mental image, sorry.

We’re just a few hours from the big project and a whole lot of fun. I’d like to invite you to join us, here’s what were doing and how we’re doing it, to convert this in a profitable business idea, of course for having a business is essential to have the right advertising, but you can learn more here about how to manage the advertising of your business.

We’re shooting fashion all day. We’re using Profoto Pro-8 Air packs with the Air Remote. We’ll be in a giant 7,000 square foot studio. We’re doing all of this live via Twitter.

twitter-logo.jpg

Beginning at 7:00am Arizona Time (8:00am PST) we’ll be sending updates to all of my twitter followers. We’ll be giving updates about what we’re doing, the setup, technical details, the styling, the models, etc. We’re going to be as transparent as possible.

The communication isn’t one way, what fun would that be? We are asking you to ask us questions along the way. Want to know how we’re doing something? Ask us. Why are we using that light modifier? Just ask. What makeup are we using? Glad you asked. What’s our workflow? Good question!

We’ll be tagging all of our twitter updates with #snapshoot so it’s easy for you to look them up down the road or even grab an RSS feed for easy viewing.

You can join in on all of this fun by simply following me on Twitter (it’s free). If you’re not sure what Twitter is take a look at this video.

Oh but wait, there’s more…

I’m going to be very busy shooting all day so I’ve asked a few people to help us out. Let me introduce the team and tell you what they’ll be doing.

MsHerr_webshot_2008.05.jpg

Heather Lynne Herr @MsHerr will be manning the keyboard all day. She’s a terrific writer, reporter, social media fanatic, and all around cool person. She’ll be forwarding questions to me and typing answers from me. She’ll be talking to the other artists in the studio and giving their updates as well. She’ll be our voice.

danno.jpg

Danno @dannophotos will be shooting behind-the-scenes photos all day long. He’ll be feeding the photos to Heather who will post them to Flickr or Twitpic for all to see. Of course as soon as a new photo is live we’ll tweet the info. Need a closer look at something? Just ask and we’ll send Danno over to grab a close up. And, yeah, he’s so cool he only needs one name.

Jeff-hs.jpg<

Jeff Caroli @speedman19 will be shooting video of everything we do – all day. In fact he’s been shooting video of all the preparation for a few days now.

All of this video footage is going to be edited and posted on YouTube, StudioLighting.net and other sites. We’ll be able to give you more in-depth explanations about what we’re doing in future videos. We plan to augment the videos with diagrams and animations just like many of our Digital Photography One on One videos. If you want to see something specific in the videos just let us know.

The Artists

Diane-hs.jpg

Diane Wallace @dianewallace is our Makeup Artist (MUA). Diane is the best half of SnapFactory. She’s an equally talented photographer but tomorrow she’ll be in her role as MUA all day. She’s been busy designing looks and matching colors and styles with the wardrobe Erin has pulled.

Because Diane and I work so closely together she’ll also be giving creative input on the entire shoot. I wouldn’t even think about shooting something on this scale without Diane on hand to help guide us. She’s a very talented artist and one job title just doesn’t do her justice.

WQ2U3086.jpg

Erin Markis is our Wardrobe Stylist. You’ve seen her in previous videos working with our models and she’ll continue that work tomorrow. She’s been working very hard to gather wardrobe from local designers and stores and has had a few challenges along the way. We’ll be covering this in some of the future videos. It’s been a journey!

Heather Blaine is our Hairstylist. She has some very impressive work and she’ll be working along side Diane and Erin all day to get the models prepped for their next set. This will be my first time working with Heather and I’m very excited about it.

Loft19_LogoSF.jpg

We’ll be shooting in 7,000 square feet of photographer heaven, otherwise known as Loft19. There are actually three studios in Loft19, we’ll be shooting in Studio One and Two. There is also a lobby, conference room, lounge area, waiting area, makeup tables, and coffee bar. This is one of the best studios in the US, so if you see something and want more info please ask about it.

Floyd Bannister is the owner of Loft19 and he’ll be assisting us all day with any equipment or studio needs. Loft19 has an amazing collection of gear and he’ll make sure we have everything we need throughout the day.

Picture 4.png

Our models are all coming from The Agency Arizona. Travis Given from The Agency AZ has been working with us for a couple of weeks to make sure we have the right models for the job. If you have any questions about rates, booking, or other model stuff we’ll pass it along to Travis.

WQ2U3083.jpg

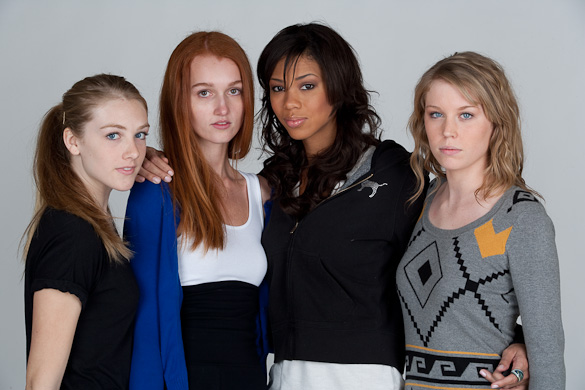
Katie Masters, Madeleine Hall, Erika Shelton, and Carly Vollmert will be our models for this shoot. We’ve already posted a quick video of them at their fitting. If you missed it you can click here to take a look.

mark-hs.jpg

And finally, there’s me. I’m Mark Wallace @jmarkwallace. I’m a commercial, fashion, and fine art photographer. I’m also a photography instructor. We’ll have plenty of time to get to know each other tomorrow. I hope you join us!

PocketWizard MiniTT1 & FlexTT5: My Experience

Late last year I got an e-mail asking if I wanted to play with a super secret PocketWizard toy. I’m a huge PocketWizard fan and so of course I said, “bring it on!” In January I was given a couple of MiniTT1 and FlexTT5’s to play with.

I’m an avid PocketWizard user, I’ve even created videos about them. I’m also a long time Canon shooter. So when the new toys arrived it was almost as good as Christmas. I hired a model for a day and hit the street.

IMG_1153.jpg

The first thing I tried was shooting with my flash “hidden” from my camera. In the first setup there was an umbrella and a column between the flash and camera. I had a MiniTT1 on the camera and a FlexTT5 on the flash. This challenge was so simple that I think the PocketWizards actually laughed at me. “Is that all ya got??” The system executed flawlessly.

My next test was to try adjust the flash exposure compensation from the camera. The new PocketWizards make the camera think the flash is actually sitting on top of the camera itself. So I ran the flash through a series of tests playing with my under and over exposure compensation settings. The PW shrugged this challenge off too. It worked perfectly.

WQ2U1082.jpgWQ2U1084.jpg

Left: proper exposure. Right: Flash set to +1 exposure compensation.

To really try some groovy tests I slid a Canon ST-E2 on top of the MiniTT1. I added another flash to the mix and was very happy to see that I could adjust the lighting ratios with the ST-E2 just like it was operating normally. The PocketWizards are essentially invisible to the system. Spectacular! It’s the best of both worlds. The ease of use of the Canon system we all know and love and the security of a radio trigger from the best in the business.

Ok, so now I knew the system could see through walls, worked flawlessly with the Canon gear I already owned, and was smaller than the other PocketWizards I had in my bag. Now it was time for some more difficult tests.

IMG_1189.jpg

The next tests were designed to see if I could shoot at a distance and in bright sunlight. Here in Phoenix the sun can be a major challenge. We rarely see clouds in the sky. This bright sunlight can really destroy a line-of-sight system. The sun just washes out the signals from the transmitter. The first test was moderately easy. I shot in the shade at a distance of about 20 feet from the flash. Not a problem at all.

WQ2U1150.jpg
My model, Sarah Coggin, smiles as I shoot away.

The moderate light and distance test was easy for the PW system. We decided to put the system to the ultimate test – direct Phoenix sunlight. We headed to Papago Park and shot in nasty 2:00 direct sunlight. This light was brutal; a true line-of-sight killer.

IMG_1202.jpg
Yeah, we were melting.

We shot a few tests in this location. I really wanted to see how the system would hold up shooting in a rugged area. Again, I had no issues. The flash behaved just as if it were sitting on top of my camera. I could adjust flash exposure compensation, turn the flash on and off, and do anything I wanted all from a distance from the flash.

WQ2U1163.jpgWQ2U1165.jpg
Left: flash turned off. Right: fill flash added.

The new PocketWizards had passed the field tests with flying colors. The following day I did a few tests in the studio just to see if they would feel at home.

_S2B1756.jpg
Canon 430 EXII mounted to a PocketWizard FlexTT5.

_S2B1758.jpg
A couple of Canon 430’s with FlexTT5 units. On Camera: MiniTT1 and Canon ST-E2

In the studio the units continued to behave as expected. By mounting a ST-E2 to the top of the MiniTT1 on my camera I was able to control light ratios right at my camera. I did a quick technical test: shoot, adjust, shoot. Repeat. Using the ST-E2 this was a breeze.

WQ2U1349.jpgWQ2U1350.jpgWQ2U1351.jpgWQ2U1352.jpgWQ2U1353.jpgWQ2U1354.jpgWQ2U1355.jpgWQ2U1356.jpg
Shifting light from left to right – all from my camera.

The last test was to shoot as the sun was going down. I wanted to see if the TTL would behave as expected with quickly changing lighting conditions. My model and I drove down the road to a local park and I shot almost directly into the sun allowing the flash to fill her face.

_S2B1791.jpg

Again, the PocketWizards behaved just fine and we were able to grab a few great shots before we lost our light.

WQ2U1385-web.jpg

While I had my test units I tried a few other things. Will they trigger a PocketWizard Plus or Plus II? Yes, they are fully compatible. Will they trigger your Profoto equipment with the PocketWizard built in? Absolutely. Are they small and easy to pack? Yes. Can you buy replacement CR2354 batteries at Walgreens? I did, however David Hobby found them a bit harder to find than I did. I guess my Walgreens rocks.

Speaking of batteries you’ll need to keep them fresh in your flash units. The TTL accuracy declines as battery power declines. For best results use an external battery pack. I use Quantum Turbo packs.

Another feature that’s really amazing is the ability to upgrade and tweak the units via a normal USB interface and the PocketWizard Utility software (included in the box). As new cameras are rolled out and things are improved you simply plug your PW into your laptop and do a quick upgrade. How cool is that?

I tested the units on Canon 420 EX, 550 EX, 430 EX II, and 580 EX II units. I did experience some minor issues with RF interference caused by the 550 and 580 EX II units. PocketWizard addresses this on their website:

RF noise emitted by the 430EX, 580EX and 580EX II flash units limits the reception range of FlexTT5 to approximately 50 feet when flash is normally mounted. Reception can be increased using steps described in the Instruction manual. It can be greatly improved by separating the flash from the FlexTT5 by using the Canon OC-E3 cord.

Hopefully newer versions of the units will eliminate this issue altogether.

A few other folks had the opportunity to play with these units prior to public release. Please take some time and read what they had to say as well:

The Bottom Line

If you’re a Canon shooter and a strobist this is a no-brainer. The MiniTT1 (for your camera) and the FlexTT5 (for your flashes) just makes sense. They are compatible with other PocketWizards and are small enough to throw in just about any camera bag.

If you’re a Nikon shooter be patient. Although I’ve not been given any information I’ll take a wild guess and say that a Nikon version has to be coming in the future. How soon? I have no idea, but I do know PocketWizard is always eager to be the best in every market.

If you’re a studio shooter, like me, who primarily shoots with studio strobes and an existing PocketWizard set up I think the MiniTT1 is a perfect choice. It has such a small profile that you’ll forget it’s on your camera. Chase Jarvis had some interesting thoughts on this subject.

For all the details and specs on the products check out the PocketWizard site:

And finally, here’s a groovy video to play us out.

Interactive Shoot, We’re Almost There

Our Interactive Shoot is approaching quickly. The Pro-8 arrived earlier and we’ve had some time to work with it a bit – it’s amazing. We have a few more things to wrap up before February 19th and I wanted to let you know where we stand.

Madeleine Hall.jpg
Madeleine Hall. Photo Credit: The Agency Arizona.

Our models have been selected from The Agency Arizona. We’ll be shooting with Erika Shelton, Madeleine Hall (pictured above), Katie Masters, and Carly Vollmert. The models will be coming to the studio tomorrow for their fitting session with Erin Markis, the Wardrobe Stylist. Diane (MUA) will also be on hand to evaluate skin tones and start prepping the looks for each girl. Heather Blaine, our hairstylist, may also be on hand depending on her schedule. Of course we’ll shoot behind the scenes video and stills and tweet what’s going on as it happens.

Loft19_LogoSF.jpg

On Monday we’ll be heading up to Loft19 to do a quick run through of the shoot with Floyd Bannister, the owner of Loft19. We’ll be shooting in several locations in Loft19, it’s a huge studio and so we’ll have some options. Because we’re only shooting for 9 hours we need to make sure we have our plan in place for set changes, lighting equipment, color schemes, etc. Loft19 has a lot of equipment and backdrops and we just want to make sure we’re in sync before we arrive on Thursday. We’ll be shooting video and tweeting this meeting as well.

The final piece of the puzzle is our wardrobe. We have several designers that will be loaning us dresses and outfits but we still have a few more things to finalize before we can make a public announcement about what we’re shooting. We should have all the paperwork in place by Monday to give you an update.

There are a few things you usually need to do to have clothes on loan for a shoot. Here’s a list of things stores and designers usually want to know:

  • Date and location of shoot.
  • Name of Photographer
  • Name of Wardrobe stylist
  • Publications that will cary the images and dates of release.
  • Statement in writing that shows they will be credited in articles or photos.
  • Insurance policy that covers all clothing on loan.

All of this is usually written in a “pull letter” that the designer can take to stores and designers. Once the store or designer agrees to the terms the Wardrobe Stylist can then “pull” the clothes for the shoot (usually the day before or day of the shoot). Normally the clothes go back to the store the day of or early morning after the shoot.

I’ll be posting more about the shoot tomorrow. I hope all of the steps of the process are helpful to you. Let us know if you have questions or would like to know more details about anything. You can post a comment (below) or send us a tweet.

1 8 9 10 11 12 23